Category Archives: WW1

Attack on Fort Vaux

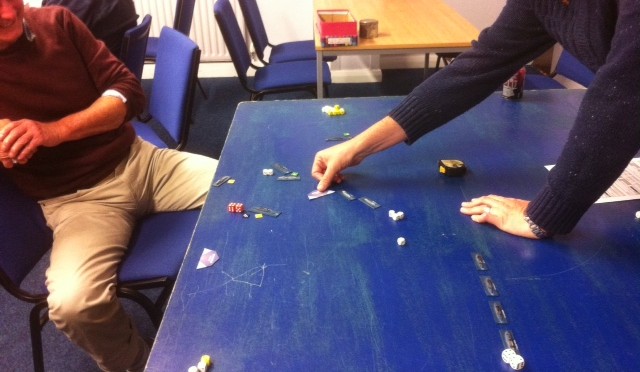
James and Paul came down to a rather busy Thursday club night to trial their new show game. The game recreates the assault through the murderous tunnels of Fort Vaux where the brave French defenders reversed the setbacks that had befallen them at Fort Douaumont. James had rather lovingly rendered the fort interior in 1/56 and the action was based on the attack of the 2 access tunnels by the German assault troops. A set of random ‘reinforcement’ cards would be placed on each section and would give the Germans extra troops, grenades or the dreaded flamethrower. The defending French also had a deck of cards to boost their defense but they could only use each card once to simulate the attrition of resources. They also has a few ‘blanks’ which did nothing.

fort_vaux1


fort_vaux4

The mechanics of the game were that the attack was over the course of 4 days. Each day was broken down into 4 assaults phases. Reinforcement cards were played at the beginning of the day. Each tunnel was sectioned in 10 barracked areas. To succeed the Germans needed to push the French back to the inner barracks area by the end of the 4th day. Any other result would be French victory. Each soldier/figures attacking or defending a barricade would roll a dice. To score a hit the attackers would need a 6, the defenders 5 or 6. Typical the attacking force would be larger. Each hit would remove a casualty and if the attackers won then they would push back the defenders the number of barricades equal the difference in the result. SO, a regular attack would be 10 Germans needing a 6 vs 8 French soldiers needing a 5 or 6. The cards would have some bearing on this.

fort_vaux2

We payed several games. The first played out at a rather protracted affair with the French slowly giving was until the fort was captured on day 3 or 4.

fort_vaux5

The second (where I was defending at the French) was a big victory to the French. Down to me throwing fistfuls of 5s and 6s. I don’t even think that Paul made it into the tunnel at tall. James did get in but ultimately came undone when he encountered a machine gun section (event card) lodged in a wider section of the tunnel. The attack was so bad that the we played a day 5 and 6 to see if the Germans could make any headway … but no

fort_vaux7


The 3rd was again quick and bloody. As the German this time I was initially repulsed by the French at the entrance. But on the 2nd assault, aided by a NCO (giving re-rolls to the dice) AND a flame thrower (each 6 rolled causes 2 hits). A rather lucky roll of 6 sixes out of 10 dice wiped of the defender in a ferocious attack.

fort_vaux6

All in all a pleasant game. Nothing too stressful, but it is designed for a quick participation show game. So all very jolly… not like the unlucky souls that had to face grenades in confined spaces and flamethrowers erupting everywhere.

We even had time to trot out a quick game of ‘The Grizzled’.lespoilus

sweet November

Keeping with the WW1 theme. This is a co-operative card game where each player takes the role of a Poilu trying to survive the war through various trials. Neither Paul or James had played it before and I was tired by this time. Whenever we play this at home with the kids its always really hard to complete successfully. But this time the cards seemed to be kind and we must have had a lucky war and despite my player ending with a string of disorders .. at one point I was a phobic, silent, tyrannical leader and one card from losing the game … we succeeded. So much so I had to read the rules again when I got home – as it seemed so easy! But no it was OK we just got lucky.

Big Squarebashing 1915!

We finally had our big battle of Squarebashing 1915 just before the anniversary year was out! The battle was a abstracted representation of the Anglo French attack at Third Battle of Artois. In reality that meant just using a normal Squarebashing trench game. There were some game specific rules to account for the large game. There were 8 players.

Germans
James
Jon
Paul (Scrivs)
Paul F

Allied
Peter (French)
Ray (British)
Richard (British)
Dene (French)

The table was 12’ , divided in to 6’ squares. Each army was 500pts (rather than 620) and could only deploy in a 6 square frontage (rather than 8) , but they could move and fire into the 2 either side of their deployment , thus allowing a potential 10 square frontage. This was to allow some interaction between the forces. As it turned out each section settled down into their respective areas and there wasn’t too much interaction between players.

While the Germans were entrenched with MG bunker, they has some fearful deletions. The trench game doesn’t use the countdown to war, but has a specific set of defender depletions on top of the dice roll. Trench games are always ‘attack in force’ (6d6), and1/3 of infantry need to be off table as reserves. In addition the defenders must damage an additional 2 bases of on table guns and 2 bases of MG. On top of that each full strength unit of infantry after depletions have been made remove a base. So at best all the Germans could only have 3 base units. The only full strength units were those in reserve. The defenders also 1d6 in each of their barrage assets. So while it started looking all rosy for the Germans the line looked remarkably thin after this!

sb

The trench game is direct. The trenches are in row 3 , and the MG bunkers in row 4. With the attacking allies getting the first turn they can (and did) assault the bunkers on turn 1. The defenders also had to raise the onslaught of the allies assets with gas , rolling barrage and point effect all possible.

However the attackers don’t get it all their own way. There is a complete line of rough going across the trench line and to assault the trenches then everyone has to roll to exit the square. This means that 1/3 of any attack is likely to get stuck and not participate. Against MG bunkers its not quite so easy.

The game looking likely it was going to be very bloody, and indeed it was. The allies pressed on quickly before the defending reinforcements could come into play. But the Germans held them back. The French , with a lot of reservists, took a lot of punishment. Pete’s densely packed ranks got by some severe German point effect barrage , and Dene on the other flank looked OK, but then threw some fearfully bad morale dice and had 2 units quit the field (which I don’t recall seeing happen before – that is 3 morale fails and then throw a 5+ to rout)

The British were more stable but didn’t really achieve much either. After the initial onslaught with many of the assets depleted the game bogged down and it looked unlikely that either side would get a major result . On the far left flank Peter threw in the towel after 90 minutes, only to realise that he couldn’t go home earlier so after sitting out for a while continued. I’m not sure that he was role playing a little Gallic temperament , or just following his normally defeatist rout to victory. I’ll give him the benefit of the doubt. On the right Dene showed savoir faire and did get a breakthrough of some success, capturing a few square of trench and ejecting the Germans , but I think Paul will put that down to ‘bad dice’ 

We played for just under 3 hours , and ran out of time when the countdown clock was on 1 . So we should have had 1 more pair of turns. But game was up. The British has had limited success in the centre capturing 2 bunkers , but with troops in a state unlikely to press the advance. The Germans still had sections that were still in good order so there was no conclusive result there. On the left Pete did have some limited success in the end, but James has cunningly picked his higher command order of assets and seemed to taking full advantage of the re-rolls that it gave him, and the French were taking a pounding.

Dene was the bright light in the attackers story. He did achieve a breakthrough into the trenches. But could not achieve a breakthrough – in games terms – to row 1

As umpire my job was to keep all the sections of the game synchronised in the unusual SB turn sequence. The game moved along OK, we could have done with 1 more hour to conclude to a calculable point, but I think were we left it was obviously heading for a draw, at best a minor victory for the allies. The trench game does have dominate early phase where everyone is at strength and the barrages are flying. If an early advantage is not achieved then that it does dwindle down to limited actions with likelihood of any major success reducing, probably much like the real thing

Thanks to all participants! The Mansfield boys for making their periodic trip down. Shout out to Richard who have never played before and was drafted in at last minute. He was put right into the centre of the attack and marched his Tommies into the machine gun fire with good grace.

Vorwärts !to 1916!!

Squarebashing day – 26th Nov

SB

So I’m looking for volunteers to participate in a big game of Squarebashing. Simon G, Pete G, Dene have already put their names forward. Is this date OK guys? We need either 6 or 8 players , so hopefully either 12′ or 16′ of WW1 Squarebashing.

Nominally this will be based on the Anglo/French attacking in the Third Battle of Artois (sept 1915 – close to our 100th anniversary date)

So the British First army (60k) , French Tenth Army (48K) vs German Sixth army (50K).

We could either play ‘regular’ for attack /defense and go through the countdown to battle.

WORLD WAR ONE NAVAL PART THREE: THE BATTLE OF THE FALKLAND ISLANDS

Background
Following the British disaster at the Battle of Coronel (see Part One), the Admiralty decided it had to send its big guns to the Southern oceans, as much for prestige and revenge as for military logic.
First Lord Fisher sent two of his prized battlecruisers, Invincible and Inflexible, under Vice Admiral Doveton Sturdee to deal with the matter. The mission was clear: to hunt down and destroy von Spee’s German East Asia squadron.

Picking up a squadron of cruisers off Brazil, Sturdee steamed south. Meanwhile, at the most important British base in the South Atlantic, Port Stanley in the Falklands, the tiny garrison readied themselves by beaching the pre-Dreadnought Canopus where it could cover the entrance to the harbour. After being victorious in the South Pacific there was every likelihood that the German squadron could raid British interests in the Atlantic. Sturdee’s squadron arrived on the 7th December, and started the arduous process of coaling up.

This process was barely complete when the Canopus sited a German shouting force (the cruisers Gneisenau and Nurnberg) off Stanley Head. The Canopus shot a couple of rounds with its 12” guns, and got a lucky shot lightly damaging the Gneisenau’s funnel. Historians have since debated von Spee’s next move; many have argues that had he attacked the British ships at anchor he could have wreaked havoc on the battlecruisers. However, he turned away and Sturdy gave chase…

The Game: Set-up
We re-fought the Battle of the Falkland Islands in the same manner as Coronel a few weeks earlier, using 1/3000th miniatures and Grand Fleet rules.
The order of battle was:

German Main Force (Von Spee: Simon Clarke)
Scharnhorst (AC), Dresden (LC), Leipzig (LC)

German Scouting Force (Captain Maerker: your humble author)
Gneisenau (AC), Nurnberg (LC)

British Battlecruisers (Sturdee: Dene Green)
Invincible (BC), Inflexible (BC)

British Armoured Cruisers (Stoddard: Andy Dumelow/Dene Green)
Kent (AC), Cornwall (AC), Carnarvon (AC)

Stoddart's armoured cruisers, followed by the Macedonia
Stoddart’s armoured cruisers, followed by the Macedonia

British Scouting Force (Luce: Andy Dumelow)
Glasgow (LC), Bristol (LC)

Unattached British Ships
Canopus (BB), Macedonia (armed merchantman)

We added in a few extra rules to reflect the nuances of the battle historically:
The Invincible and Inflexible were subject to my own “British Battlecruiser” rule, i.e. when each group of hit boxes was ticked off, they could spontaneously explode on a roll of 1 on a d6;
The Canopus, of course, could not move;
Carnarvon was suffering boiler problems, and so was reduced in speed.

The Game: How It Played
We deployed the Gneisenau as it was historically, i.e. in extreme gun range of the Canopus. Merker’s squadron turned away to get out of range…this is when the battlecruisers appeared, coming full steam out of Port Stanley harbour, their flank protected by Luce’s light cruisers.

Von Spee crossing the British T

Instead of fleeing, the Germans instead turned to cross the T of their much bigger opponents. This gave Sturdee the opportunity to put a few salvoes into the hapless Nurnberg while he was pursuing the armoured cruisers, crippling it early on. Meanwhile, Sir John Luce’s light cruisers engaged in their own battle with the German equivalents, HMS Glasgow in particular gaining revenge for the British humiliation at Coronel…it outmanoeuvred and eventually sank the Dresden.

Von Spee’s manoeuvre paid off brilliantly and Scharnhorst and Gneisenau were able to put salvo after salvo into the Inflexible (although not until the latter had also done serious damage to the Gneisenau). Eventually the Inflexible was sunk, followed by Maerker’s flagship.

The Inflexible, just before she was sank

This coincided with the late arrival of Stoddart’s armoured cruisers, who added some muscle to the British attack. Discretion became the better part of valour and the remaining Germans fled. As with the historic outcome a British triumph, although the loss of the Inflexible made it a Pyrrhic victory.

Casualties
German: 1 AC sunk (Gneisenau), 1 LC sunk (Dresden), 1 LC crippled (Nurnberg)
British: 1 BC sunk (Inflexible), 1 BC crippled (Invincible), 1 LC badly damaged (Glasgow).