All posts by Jon Phipps

WORLD WAR ONE NAVAL PART THREE: THE BATTLE OF THE FALKLAND ISLANDS

Background
Following the British disaster at the Battle of Coronel (see Part One), the Admiralty decided it had to send its big guns to the Southern oceans, as much for prestige and revenge as for military logic.
First Lord Fisher sent two of his prized battlecruisers, Invincible and Inflexible, under Vice Admiral Doveton Sturdee to deal with the matter. The mission was clear: to hunt down and destroy von Spee’s German East Asia squadron.

Picking up a squadron of cruisers off Brazil, Sturdee steamed south. Meanwhile, at the most important British base in the South Atlantic, Port Stanley in the Falklands, the tiny garrison readied themselves by beaching the pre-Dreadnought Canopus where it could cover the entrance to the harbour. After being victorious in the South Pacific there was every likelihood that the German squadron could raid British interests in the Atlantic. Sturdee’s squadron arrived on the 7th December, and started the arduous process of coaling up.

This process was barely complete when the Canopus sited a German shouting force (the cruisers Gneisenau and Nurnberg) off Stanley Head. The Canopus shot a couple of rounds with its 12” guns, and got a lucky shot lightly damaging the Gneisenau’s funnel. Historians have since debated von Spee’s next move; many have argues that had he attacked the British ships at anchor he could have wreaked havoc on the battlecruisers. However, he turned away and Sturdy gave chase…

The Game: Set-up
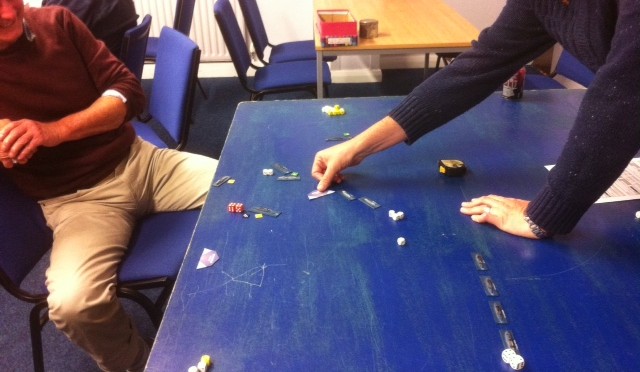
We re-fought the Battle of the Falkland Islands in the same manner as Coronel a few weeks earlier, using 1/3000th miniatures and Grand Fleet rules.
The order of battle was:

German Main Force (Von Spee: Simon Clarke)
Scharnhorst (AC), Dresden (LC), Leipzig (LC)

German Scouting Force (Captain Maerker: your humble author)
Gneisenau (AC), Nurnberg (LC)

British Battlecruisers (Sturdee: Dene Green)
Invincible (BC), Inflexible (BC)

British Armoured Cruisers (Stoddard: Andy Dumelow/Dene Green)
Kent (AC), Cornwall (AC), Carnarvon (AC)

Stoddart's armoured cruisers, followed by the Macedonia
Stoddart’s armoured cruisers, followed by the Macedonia

British Scouting Force (Luce: Andy Dumelow)
Glasgow (LC), Bristol (LC)

Unattached British Ships
Canopus (BB), Macedonia (armed merchantman)

We added in a few extra rules to reflect the nuances of the battle historically:
The Invincible and Inflexible were subject to my own “British Battlecruiser” rule, i.e. when each group of hit boxes was ticked off, they could spontaneously explode on a roll of 1 on a d6;
The Canopus, of course, could not move;
Carnarvon was suffering boiler problems, and so was reduced in speed.

The Game: How It Played
We deployed the Gneisenau as it was historically, i.e. in extreme gun range of the Canopus. Merker’s squadron turned away to get out of range…this is when the battlecruisers appeared, coming full steam out of Port Stanley harbour, their flank protected by Luce’s light cruisers.

Von Spee crossing the British T

Instead of fleeing, the Germans instead turned to cross the T of their much bigger opponents. This gave Sturdee the opportunity to put a few salvoes into the hapless Nurnberg while he was pursuing the armoured cruisers, crippling it early on. Meanwhile, Sir John Luce’s light cruisers engaged in their own battle with the German equivalents, HMS Glasgow in particular gaining revenge for the British humiliation at Coronel…it outmanoeuvred and eventually sank the Dresden.

Von Spee’s manoeuvre paid off brilliantly and Scharnhorst and Gneisenau were able to put salvo after salvo into the Inflexible (although not until the latter had also done serious damage to the Gneisenau). Eventually the Inflexible was sunk, followed by Maerker’s flagship.

The Inflexible, just before she was sank

This coincided with the late arrival of Stoddart’s armoured cruisers, who added some muscle to the British attack. Discretion became the better part of valour and the remaining Germans fled. As with the historic outcome a British triumph, although the loss of the Inflexible made it a Pyrrhic victory.

Casualties
German: 1 AC sunk (Gneisenau), 1 LC sunk (Dresden), 1 LC crippled (Nurnberg)
British: 1 BC sunk (Inflexible), 1 BC crippled (Invincible), 1 LC badly damaged (Glasgow).


World War One Naval Part Two: Resources for the Battle of Coronel

In order to re-fight Coronel, it was crucial that the ship’s stats for the various ships was, relatively speaking, as accurate as possible.

The word documents below cover both squadrons, von Spee’s and Cradock’s. Cradock’s squadron includes the “What if…?” variant, specifically the addition of the Canopus and Defence.  Note that the Canopus has a special rule concerning its movement; this stimulates the rather dodgy boilers which plagues the ship at this period, and led to her being beached in Port Stanley as a fortified bunker.

The other thing that needs considering is the quality of both admirals. Although the Royal Navy already has a number of disadvantages, their relative qualities means that von Spee is rates +2 on the initiative dice, and poor old Cradock -1.

For the “What if…?” variant, you can argue that Cradock was not a bad admiral, he simply had poor ships. In which case you can rate von Spee at +1 and Cradock at 0.

Ship Stats Brit Coronel

Ship Stats Ger Coronel

World War One Naval Part one: Trouble in the Southern Ocean

As part of the ongoing commemoration of the Great War, my contribution was to go down a different route from the excellent Squarebashing games; my chosen interest was the naval aspect of the war.

There are many rules and figures out there. The rules I ended up going with are the “Grand Fleets” rules, published by Majestic 12 Games. They have the advantage of a tow-tier approach…an entry-level set of rules to get players warmed up and used to them; and a complete set, which are far more detailed and enable the subtleties of the period to be captured. In addition, the entry-level rules can be downloaded for free.

In terms of scales, well, the two most common are 1/1200 and 1/3000. In the end I plumped for the latter. The ships may be a bit small for the initial cruiser battles I had planned, but I did have half an eye on something much larger…Jutland, with its 100th anniversary in May 2016.

But I needed something more modest to get the BAD Wargamers interested and familiar with the rules. The Battle of Heligoland Bight was the first significant naval action of the war, but it’s quite a complex affair, so I plumped for something manageable, namely the Battle of Coronel.


Background

The German East Asia Squadron was one of the Imperial Navy’s elite units: the most modern cruisers, the best crews, and commanded by one of the German navy’s most promising officers, Vice-Admiral Graf Maximilian von Spee. It was based in the German enclave of Tsingtao in China.

In anticipation of the start of the war, von Spee moved the squadron to the German Caroline islands. On the outbreak of war, he dispatched the light cruiser Emden to the Indian Ocean to create mischief (another story) and proceeded to raid allied bases and attack merchantmen in the Pacific with the rest of the squadron. Even without the Emden, he still had a powerful raiding force: the armoured cruisers Scharnhorst and Gneisenau; and the light cruisers Leipzig, Dresden and Nurnberg.

SMS Scharnhorst, von Spee's flagship
SMS Scharnhorst, von Spee’s flagship

When Tsingtao was invested by the Japanese, von Spee decided to make a dash for home via Cape Horn, causing as much mayhem as possible on his way back to Wilhelmshaven.

When the Royal Navy realised he was off the Pacific coast of South America, they dispatched the only force they had in the area: a small cruiser force at the Falkland Islands commanded by Rear Admiral Christopher Cradock. Cradock’s force could not have been more different from von Spee’s; he had two obsolete armoured cruisers, the Monmouth and his flagship the Good Hope; the pre-dreadnought Canopus; an armed liner Otranto; and his only modern ship the light cruiser Glasgow. He was due to be reinforced by the modern armoured cruiser Defence, but halfway down the Atlantic the latter was redeployed to chase the German battlecruiser Goeben in the Mediterranean.

HMS Glasgow
HMS Glasgow

On receiving his orders, Cradock left the Canopus behind (due to ongoing boiler problems) and went up the coast of Chile to find von Spee. He did so on the 1st November 1914, off Coronel. Von Spee skilfully avoided battle until the sun had sunk behind Cradock’s force, silhouetting them against the horizon. Scharnhorst and Gneisenau put salvo after salvo into the British armoured cruisers until they went down (without even landing a hit on their German counterparts). The Glasgow, which had the honour of being the only Royal Navy ship to land a hit on the Germans, made use of its speed and escaped. The Otranto, wisely, fled south as soon as von Spee’s squadron was observed.

The Battle of Coronel

It was a bitter blow for the British, the first defeat for the Royal Navy since the days of sail, and the anger and dismay were felt throughout the Empire…


The Refights #1 and #2

As part of the first go at the Grand Fleet rules, we did a straight refight of the Battle of Coronel. Simon Clarke took the role of von Spee and Andy Dumelow as Cradock.

As expected, the battle went according to history, with a resounding German success. This time the Otranto and Glasgow also got seriously stuck in and went gallantly to a watery grave. A few more hits landed on von Spee’s squadron than was the historic outcome, but nothing to trouble the German navy too much.

As we were using the entry-level rules, and the game was quite a small one, it was over in an hour. That gave us the opportunity to try out a “what if” variation. This time we gave the Brits both the Canopus and the Defence. The outcome of the game was a closer one, with the Nurnberg getting sunk and several other German ships getting damaged but once again the victory was von Spee’s.

Next time we shall re-fight the Battle of the Falkland Islands…British Revenge?

World War One Naval

As part of the ongoing commemoration on the centenary of the First World War, over the next few weeks/months I’d like to put on a number of naval battles. These will basically be the pre-Jutland battles: the flight of the Goeben; the raid on Heligoland Bight; Coronel; the battle of the Falklands; and the battle of Dogger Bank.


I’m building up the collection of ships and developing rules of my own devising. I’d like to try out the first battle (probably Coronel) on the 13th August). All welcome to join in…please let me know if you’re interested.

BADCON: Story of a Wargames Competition

imageBadcon, held in February of every year, is widely regarded (or so our guests tell us anyway!) as one of the friendliest competitions in the competition calendar. It could be our powers of organisation, it could be us seizing the zeitgeist in terms of the current rules systems or it could just be the appeal of the Burton beer. Regardless, Badcon certainly punches above its weight in terms of its popularity.

The competition dates back to the mid-1990s. Inspired by similar competitions in Derby, Reading, Devizes but most of all Usk, the BAD Wargamers decided to host its own, with a distinctly Ancients theme.

The inaugural year for Badcon was 1996. Held in the Riverside Leisure Centre, in Burton’s attractive floodplains, the competition initially drew 36 teams, and used a sole set of rules, i.e. De Bellus Multitudinous. DBM, as it was affectionately known, was the premier Ancients set of its day, having grown out of the mini-De Bellus Antiquitas (DBA), which itself evolved from the much-maligned WRG 7th Edition Ancients rules. Teams were in pairs, a format that followed the Godendag (Usk) model.

From those small acorns, the Badcon competition grew. In 1998, a new venue was sought; initially this was to have been the Bass Sports & Social Club, but having let the club down at the 11th hour, an alternative venue (in the shape of the prestigious Burton Guild Hall) was found. Awareness of the competition had grown rapidly, because in its third year, there were already 60 teams competing.

In 1999, the venue changed again, this time to Burton’s Victorian Gothic Town Hall, where it has remained ever since. Badcon continued to grow in popularity as one of the UK’s premier DBM competitions, with a peak of 80 teams in 2002. Although it never quite reached those dizzy heights again, it was still exceptionally popular, averaging 55-70 teams a year.

Another important change took place in 2008, with Badcon no longer specialising purely in DBM. In that year it was joined by a new set called Field of Glory (FOG) and (cover your ears, wargames purists) Warhammer 40K. The split in the number of teams in 2008 was: DBM 30 teams; FOG 18 teams; 40K 6 teams.

The competition in 2008 was the last time DBM held prominence. In 2009, the unruly cuckoo in the nest that was FOG drew 46 teams, compared with 12 for DBM (and yes, 40K was dropped). Ever since 2009, FOG has been the dominant competition at Badcon. In 2011, there were just 4 DBM teams, with the appeal of that system further eroded by DBMM (which attracted 10 teams, still well below the FOG numbers of 50 teams).

DBM was dropped the following year, but Badcon was still home to three competitions: FOG, DBMM and yet another new set, FOG Renaissance (FOGR). The split in teams in 2012 was FOG 42, DBMM 10 and FOGR 12. 2012 also saw a new innovation, with our friends from the Alumwell club being invited to put on their own mini-Flames of War competition, initially drawing 11 teams.

A scene from Badcon 2014...Early Navarrese face their Medieval descendants.
A scene from Badcon 2014…Early Navarrese face their Medieval descendants.

Which brings us to 2014, the 19th time Badcon has been held. This year, FOG still ruled the roost with 28 teams entering; followed by FOGR with 18 teams, DBMM with 12 teams and Alumwell’s Wild West competition with 8 entrants. Long may the show continue.

A few worthy factoids:

  • Not content with prizes just for 1ts, 2nd and 3rd, Badcon is renowned for offering a whole host of prizes: the team with Best Sportsmanship; Best Painted Team; Best painted Baggage; and the coveted Booby prize;
  • Burton players rarely do well in their own competition. Naturally this is because we are so sportsmanlike and it would be unseemly to do well in our own competition;
  • The sprint to Spirit Games during the Saturday lunch break has become something of a tradition.

And yes, we still have the best beer of any competition…