Ray and I played a canal crossing in Squarebashing. I have written an AAR on my blog


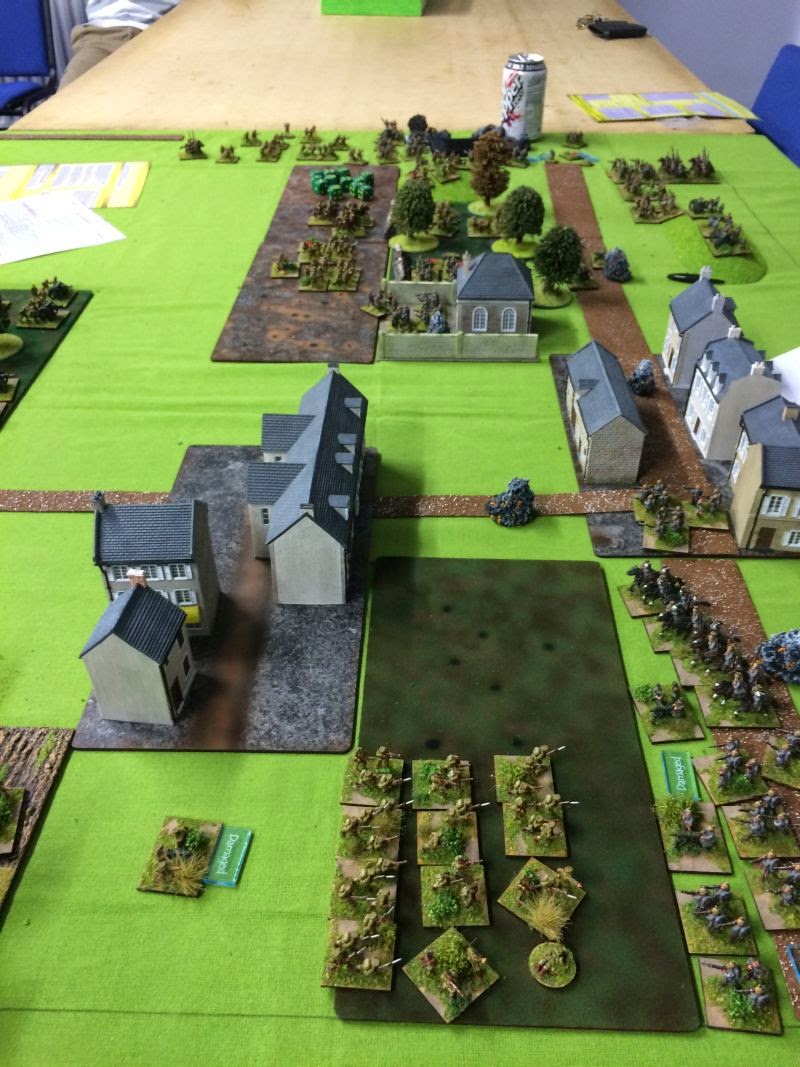 Last night James and Scrivs came down for a game of squarebashing. Paul has diligently documented the event here !
http://scrivsland.blogspot.co.uk/2015/05/something-new-square-bashing.html
Thanks to both of them for coming down and being pleasant opponents. Looking forward to the game you’re hosting soon ! 🙂
I have put together a spreadsheet that helps generate army lists for excellent peter pig Square Bashing Rule Set.
It is not complicated but does take some of the ‘brain ache’ away when trying to squeeze that last unit into the points limit! It is also intended to act as an easy reference for the starting asset values. If I have uploaded this correctly it can be found from this link;
http://badwargamers.com/bad/?attachment_id=806
Please feel free to use this but it is definitely not for commercial exploitation.
Let me know if there is a problem.
Paul
We’ve been playing Squarebashing for about a year now, so its time I wrote up a review. For the centennial of WW1, we’ve just concentrated on 1914 armies, and in this game we see the plucky BEF face of the Germans.
The Armies.
The classifications are pretty simplistic. Infantry and cavalry are broken down into reserves, regulars and professional. Each battalion is 4 bases in strength. MGs and artillery are single bases. Tanks and A/Cs are all single models.
The BEF are predominately professional, and therefore are small. The ‘standard’ game we played was something like 7 professional battalions, 2 regulars, 4 MGs and 4 artillery.
The German army of this period is based around a regular force. So we had 10 regulars, 2 reservist, 2 professional and 3 regular cavalry. In addition there were 4 artillery and 3 MGs.
With each army comes a set of assets (artillery barrages) and also ‘events’ (these being randomly determined effects that effect the game in some way)… more of these later.
This all comes round to a overall army status rating. This will determine the overall quality of the army (and ultimately and delta adjustment that is applied to the final victory point tally)
Countdown to War.
Peter Pigs rules often have a pre battle phase, Squarebashing is no exception. This consists of a 3 week period where events make have an effect on the game. This takes the form of a calendar in which you allocate values, which become numbers of dice. You and your opponent then do and opposed dice off (5&6s being successes) . The player with the higher number of successes then has the access to their armies ‘events’. This is a 2 dice roll. Values of 2-5 having a negative effect , and 5+ being positive (generally the higher the better). You can roll –over success to the next day, then gives you increased dice to throw and should you win and modifier to you event roll (+6) ,so you cannot get a bad result. With each event comes an attacking value. These are accumulated, and will determine who the attacker in the game is – and the level of attack
There are strategies to this. If you have a defensively minded army then you can stack alternate days to try and neutralise your opponent’s throws. However, I never seem to get this to work as I expect – or certainly not in a way that feels ‘favourable’
In the game we played here, we kept the values as ‘default’. The BEF doesn’t like to attack in my experience, but neither does it like to suffer ‘the big push’ …
The narrative that was rolled in the game was,
The BEF had initial good news (lucky dice), and Kitchener gave his ‘Khartoum speech’. This meant that the BEF could choose to reroll two sets of assault dice (both players)
Then the Germans just took over. The weather was good, and high command had issued aggressive orders. In game terms this meant that the Germans could ignore any terrain penalties for moving in turns 1 & 2 (so they would be moving swiftly). It also netted a good chunk of attack points. They also exploited gaps in the BEF line (this meant that 2 BEF battalions would be sent into reserve). This meant that the Germans were most likely to attack
Combined with the fact that the Germans had some cavalry (boosting the likelihood of attacking). It wasn’t quite ‘the big push’, but it was ‘attack all along the line’.

Objectives, Terrain and deployment.
The table is 4’x3’, broken down into 6” squares. The defender sits at row 1 (the attacker row 6). Two roads are played (one by each player). The resulting crossroads is 1 objective. The defender then places another 3 objectives. There are restrictions. They cannot be placed in adjacent column, and the total of all the objects rows must be 13 or more. So what that means is that the objective are space across the table, and in games we tend to give one object to the attacker (row 5 or 6) to allow the other objective to be places in lower value rows. In the game objective further across the table will gain you larger victory points.
After the objective the defender places 8 pieces of terrain. Each terrain piece is 12”x6” (2 squares) , whereas an objective is 6”x6”. This makes it really easy to spot these things in the game.
The most notable effect of terrain is that troops have to dice to leave a terrain square. Once your Austrian conscripts have gone into that wood they really don’t like to come out! Other effects are that some terrain provides cover and some block LOS (although that is not so relevant)
In the game here with the Germans having unrestricted movement in turns 1 & 2 then they wasn’t much point in jamming up the top of the table to hinder their approach. So the BEF tried to construct a strong defensive line across the middle of the table.
The attacker does get some say. They get to allocate d6 dice to terrain and on a roll of 4+ they get to move them. In the game here that meant that the Germans could open up a corridor of open space to the left of the battlefield. To attempt to split the BEF, give a space for their cavalry to operate, and achieve a breakthrough.
The attacker then deploys the whole force in row 6, the defender then deploys in rows 1&2. Each square has a max occupancy of 3 units. If the attacker has more than 18 units then they have some that are forced into reserve.

Depletions.
Everyone’s favourite part of the game! Before the game begins the attacker gets to deplete the defenders army. You can think of this in terms of preliminary barrage, or units losing their way of reassigned to a different section. What it means is that depending on the level of attack, a number of dice are thrown between 5-9~. For each 6 thrown one base of removed from the defenders battalion. This is done for each battalion (from R-L). Rather than taking the casualties the defender can put the troops into reserve. The throw can be modified by troop quality, placement and type. The defender must also have at least 1/3 (rounded down) of their infantry and cavalry off table).
This phase can be rather tense. If the attacker throws well then you can lose a lot of troops and you have a tricky decision to make whether to suffer the casualties of bring the troops on during the game. This is not a quick and reliable process.
In the game here we have 9 BEF battalions. 2 already have to be placed in reserve as a result of countdown to war events. So, only 1 more needed to go to reserve. The Germans scored well and the central objective had one of its professionals reduced to half strength. Placing then in reserve wasn’t really an option as the movement bonuses the Germans had would allow them to capture it quickly.
The BEF would be up against it. Their army was split. The left flank was isolated (although in good order), defending the crossroads in the town. The centre had been denuded significantly. The right flank was in good order, but strategically had little to do.
The defender then gets to place 2 sections of barricades.
Finally before the game begins each sides gets to pick a higher command strategy. There are 4 types available. Fighting, Morale, Assets and Movement – each with an associated bonus in that area.
The Germans picked Fighting. The BEF picked Morale.
The Game Turn.
There are quite a lot of phase in each game turn, and this can be quite daunting at first. Its definitely worth keeping the QRS to hand, as its listed there. Really it a good plan to stick to it rigidly to start as there are some nuances on the order of things. I won’t go in to explicit details on the order, but will try to give a flavour.
Assets
At the start of the game each army has a unique asset pool. This is a pool of dice in which to request that asset. Once the dice is used then that’s it. To successfully request and asset a single 6 is required. So for instance if you had 10 point effect barrage you could roll 1 dice for 10 turns hoping for a 6. More likely you would have 2 attempts with 5 dice. There are about a dozen or so assets and you can only pick 1 per turn. The game is about typically 6-8 turns long (could be as low as 4, or as high as 20 though!)
Morale
The trigger for a morale check is having a casualty figure in a square. A number of dice are accrued, 1 each of casualties , barrage, surrounded by opponents etc. These can be reduced by quality and ‘markers’. For each 4+ thrown this is 1 morale failure. 1 means no advance up to 3+ which is ‘quit the field’. Which sounds worse that it is. It means that if you have taken a couple of casualties (2 dice) from fire and under point effect barrage (3 dice) things aren’t going to go too well.
Movement
Infantry move 2 squares, cavalry 3, MG and Guns 1. No diagonals, quite easy. You can get a bonus move square if you don’t end up in a square adjacent to the enemy. The main issue for movement is leaving any terrain square to another. Each battalion dices to try and exit a terrain square. Professionals needing 2+, Conscripts 4+ . This can put a scupper on well laid plans!
Assault.
This is the main way of destroying the enemy and capturing a square. If a unit has movement points left it may assault a square occupied by the enemy. Each units in the assaulting square typically generates 3 dice (remembering a square occupancy limit of 3). Assaults need to be supported. Adjacent square add 2 dice to assaulters ‘dice pot’. Markers , flanks and lots of other little bonuses can add to that, defences etc can reduce it.
The defender normally gets 2 dice (5 dice for MGs!!) per unit & 1 dice per support square. Again a set of modifiers with add and subtract from that dice pool.
Both sides roll the dice, 5&6s are hits. Saves are then made. So infantry get a 50/50 save, again better and worse quality factors apply. If the attacker inflicts more hits then they win, and force the defenders to retreat a square and they move to occupy it. Casualty markers accrue and morale checks will be needed in the subsequent phase. Once you retreat you also take additional hits, it’s a slippery slope.
Shooting
You shoot in your opponent turn. Any square that has not been assaulted can fire. The range is only adjacent, except for artillery and mortars, so there is little need for LOS. Each battalion fires 1 dice and needs a 6 to hits (which can then be saved). It’s unlikely that you will drive your opponent off with shooting.
Reserves
If a side has reserves it can dice for arrival now. There are 3 options
1. Each units dices. A 6 and it can arrive
2. 1 unit comes on automatically
3. 1 unit comes on automatically on the road entrance square. 2 more dice rolls (needing 6) are also done.
Number 3 is most popular, and its not unusually for a defensive strategy to revolve around where the road is, as that is easier to defend.
Countdown clock.
The defender rolls 1 die. This is then knocked of the countdown clock (starting at 21). When it gets to 0 then the game ends.
Victory calculation.
When the game ends the victory points are calculated. Each KPI is either a value or a dice. The dice are thrown for a resulting victory points. So it can be a bit random. But in my experience it never makes a lot of difference in an ‘obvious’ victory, but can swing games that are closer. Each side’s values are compared and the resultant delta it referenced on a chart to get the final result. The key objectives are –
Defenders bonus. The defender gets bonus points for the level of attack they have to face.
Our game.
The game we played was pretty straightforward. The Germans has gained an advantage in the pre game phases. Their events had synergies, and the BEF had been depleted in the centre. The attacking Germans first turn called in a point effect barrage on the BEF centre. When a point effect barrage is rolled you place 9 barrage marked on an L shape of 3 squares. The square also takes hits. So if you take a casualties (d6 hits) , you are looking at a severe morale check in the next turn (a minimum of 4 dice), this can be reduced by a higher command order. The BEF had picked morale has their higher command. However, the first base to be lost (although only put in reserve) was the higher command team itself. So it moved off table and then the next turn couldn’t try to save its soldiers.

The resulting morale check was grim. One object was completely evacuated, and the other was down to a damaged MG and 2 bases of infantry.

The BEF had to shuffle to the right to try and fill the gaps that were opened in the centre. But that meant the right flank was becoming thin. They successfully received a suppression barrage (a 5 square long line of barrage markers), this did halt the Germans advance for 1 turn, but the BEF were just too thin on the ground.

The left flank had 2 battalions of professional and a MG in a barricaded square (pretty tough). But it was isolated. It was surrounded and assaulted. The killer being that the gap that was opened up by the Germans allowed the cavalry to get behind the isolated Brits. This means that if you lose the assault then you cannot retreat and take additional hits. The BEF saves were good, but it was only a matter of time before they were whittled down. The German has captured two of the closer objectives at the start of the game, and were soon captured the left flack crossroads. They also got their cavalry to the BEF baseline to get a breakthrough bonus! The cavalry who are normally gunned down in games were definitely the stars with the swift advance, and stopped the BEF from retiring.

The BEF were reduced to bring on a drib drab of reserves who were close the enemy and rushing to defend the last central objective. Which held on to, but it wasn’t enough. The Germans has achieved a solid victory.

Conclusion
I like Squarebashing. I love the fact that it has a lot of chrome for the period. It does allow for forging a strong narrative in a game. Each stage of the game is documented and complete. I like the pre battle phase and terrain placement. I’m not a fan of ‘terrain placed by mutual agreement’ type rules.
Being a grid game it is anachronistic, and probably won’t be to everyone’s tastes. But I would recommend that anyone who has an interest in this period take a look

Georgies view –
I have to say I liked the game myself! The fate of the game was pretty much decided: Germans! The Britain’s were more Quality than Quantity and in this sort of game you need Quantity! In only the first few goes, the Germans had put most of the English men into reserve! The next couple of goes was total disaster, the Germans planted a destroying barrage on the mainly important (and the minimal amount of) soldiers, killing quite a few soldiers! Since you don’t have to measure the route, they could reach you in an amount of seconds! Near the end of the game (which was very long) I felt myself drifting away from the game. I would highly recommend this game to people who have a very wide attention span so that you can remain focused on the game! There is plenty to worry about because lots is always going on! I think it is a quite clever game!
