Category Archives: FoG:R

Gemauerthof 1705

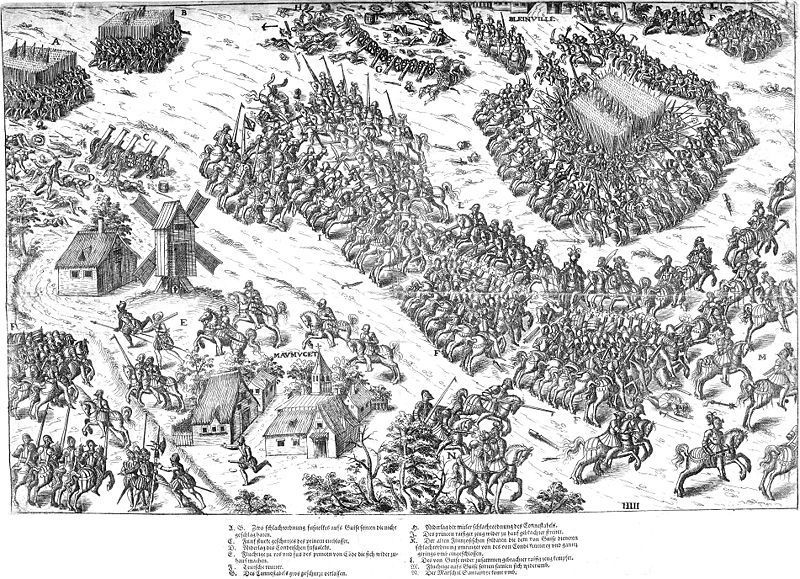
In 1704 the Swedish territory of Ingria (South of Finland on the Baltic coast) fell to the Russians. They planned to take another Swedish Baltic territory, Courland, in their 1705 campaign.
The main Swedish army under Charles XII was quartered well to the south around Warsaw with only around 9000 men under Major General Lewenhaupt left to garrison the whole of Courland. The Russians organized an invasion force under Field Marshal Sheremetev with the aim of cutting Lewenhaupt off from the main Swedish base at Riga and bringing him to a decisive battle. The force comprised 9 dragoon regiments (7000 men), 3 infantry regiments (3000), irregular Cossack cavalry (300), 6 light guns and 10 howitzers.

1

Collecting as many men as he dare from various garrisons in Courland Lewenhaupt put together a force of around 7000 (approx. 4500 infantry and 2500 cavalry) . He requested reinforcements from Riga and was given an extra 1000 infantry in a combined regiment. The Swedish forces eventually gathered around the town of Gemauerthof. The Russians, encouraged by a series of successful raids and skirmishes, were eager to engage. They marched to cut off the main road to the north, putting themselves between Lewnhaupt and his escape route to Riga.
The Swedish command were also keen to engage the enemy, and decided to hold their strong defensive position against an expected Russian assault. Their left flank was secured by the wide but fordable River Schwedt and their right by the smaller but marshier course of the Klein Wilzen. Behind them was a wooded area covering the road and bridge to Gemauerthof on the opposite bank of the Schwedt. As per convention the Swedish Infantry formed the centre with cavalry deployed on both flanks.
The Russians arrived from the north-east around 5pm. They scouted the Swedish positions and decided to hold off any attack until the following morning, due to the lateness of the hour and the length of the march they had made that day. Shremetev deployed his forces for the night to cover the routes north from Gemauerthof, keeping an area of woodland between him and the Swedes. The Russians also followed convention with their infantry in the centre and a dragoon brigade on each flank, but the other dragoon brigade was sent across the River Schwedt to cover any Swedish move on that bank.

Lewenhaupt had also decided to put off any engagement until the following day, content to send out scouts with orders not to stray too close to or engage with the enemy. For some reason the Swedish Colonel Stackelberg chose to ride forward and take command of the scouting party, pushing them further forward than intended, beyond the wooded area covering the Russian army. They were attacked by the lead Russian units immediately and soon forced to retire. The Russians feared the Swedes were trying to break out or withdraw to Riga and soon the whole Russian army pursued the enemy scouts through the woods, becoming disjointed as they did so.

2

By now the Swedish battle line was advancing en masse to engage the Russians as they emerged from the woods. The fighting was fierce all along the line. The Swedish cavalry on the right hit the Russian infantry hard but they were saved when Kropotov’s Dragoons counter attacked and they managed to rally. The Swedish left wing suffered badly when they were hit in the flank by the Russian Dragoons crossing back over the River Schwedt. The Uppland regiment lost half of its strength, with their Colonel amongst the casualties, and many of the Swedish cavalry fled to Gemauerthof and beyond to spread news of defeat. The victorious Russian Dragoons failed to press their advantage, preferring instead to pillage the Swedish baggage. This gave the Swedish infantry in the centre time to react, aided by small cavalry reserves in the second line.

3

Several unco-ordinated Russian attacks were beaten off and the Swedes were then able to launch a counter attack on the Russian infantry in the centre. The Russian line was gradually wheeled back to the line of the Klein Wilzen, despite a spirited charge by Ignatiev’s Dragoons that was halted by a withering Swedish salvo. Both sides were thoroughly disorganised after more than two hours fighting and they paused to reorganize their lines. The Russians were now formed up along the eastern bank of the Klein Wilzen and the Swedish on the west bank.
Lewenhaupt planned another co-ordinated attack on the shaken Russians, but the impetuous Stackelberg again pre-empted him and led his own cavalry assault first. Confused fighting with minor breakthroughs and repulses continued until around 9:30pm. By now both sides were exhausted but still holding formation. The Russians used nightfall to make an orderly retreat, but it seems to have degenerated into a near rout. The Swedes, exhausted and still wary, did not pursue and remained in their battlefield positions overnight.
It had been a hard won and narrow victory for the Swedes but Courland was only briefly saved. The Russians could make good their losses, Lewenhaupt could not.
The forces used for the club re-fight were as follows –

SWEDES

C in C Lewenhaupt
Left Wing – Wennerstadt
2 superior horse, unarmoured, determined, impact, sword
1 average horse, unarmoured, determined, impact, sword

Centre – Stackelberg
4 superior foot, (4 musket 2 pike), salvo1 average foot, (4 musket 2 pike), salvo
4 light guns

Right Wing – Schreiterfeldt
2 superior horse, unarmoured, determined, impact, sword
1 average horse, unarmoured, determined, impact, sword

RUSSIANS

C in C Sheremetev
Left Wing – Kropotov
3 average horse, unarmoured, determined, pistol, pistol
1 average light horse, unarmoured, carbine, light lance

Centre – Chambers
3 average foot, (5 musket 1 pike)
2 medium guns
2 light guns

Right Wing – Ignatyev
3 average horse, unarmoured, determined, pistol, pistol

Across River Schwedt – Bauer
3 average horse,unarmoured, determined, pistol, pistol

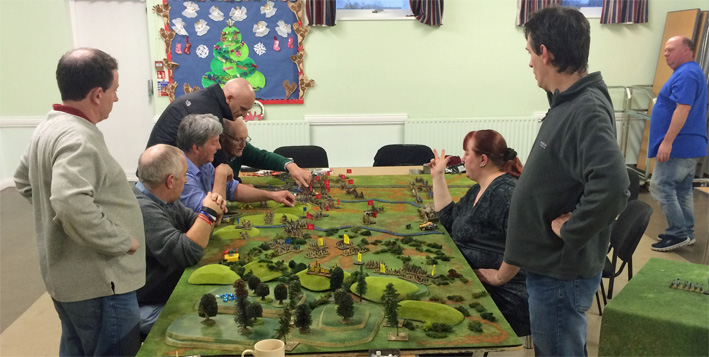
Steve and Pete took command of the Russians for this engagement and the Danish Brothers (should that be the Swedish siblings?) Simon and Dene controlled the Swedes.
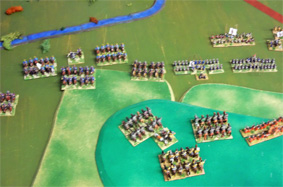
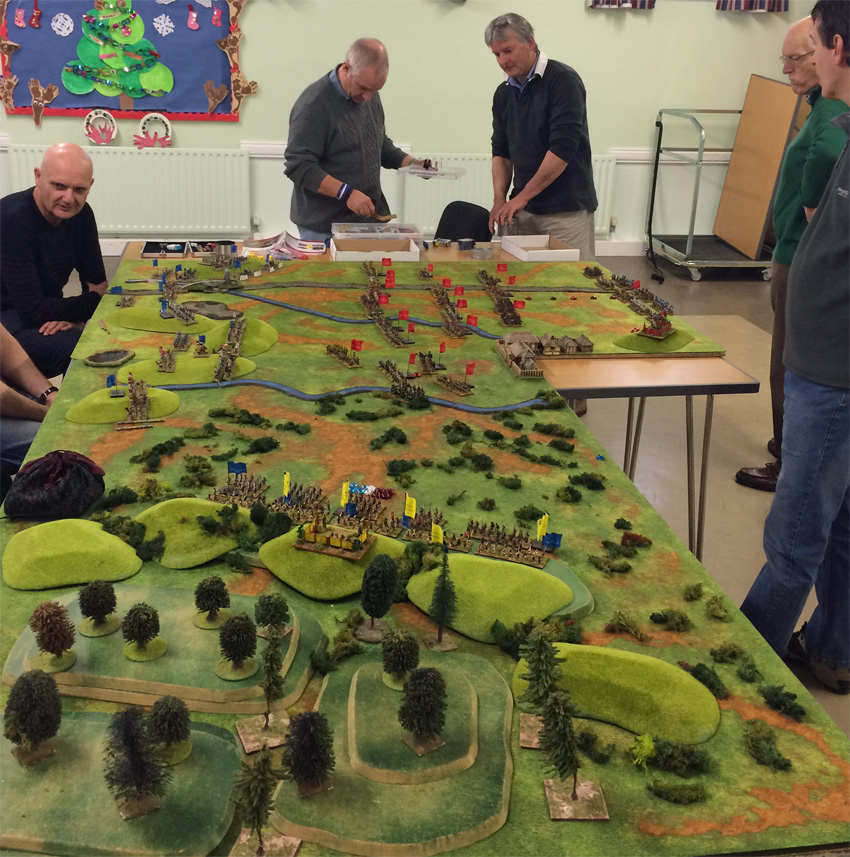
The action was fought lengthways along a 6’ x 4’ table with the Schwedt forming one long edge and the Klein Wilzen the other. A wooded area reached almost across the table width on the Russian side, concealing each side’s deployment and initial moves from each other. A road ran alongside the Schwedt from Gemauerthof northwards through the woods – the best route back towards Riga for the Swedes.

4

The only unit on table at the start of the battle was a base of mounted Swedish scouts. They were pushed forward towards the supposed Russian position at march speed, and again when they were joined by Stackelberg. At this point random dice rolls determined how quickly the patrol would spot the Russians and how far away they would be. The rolls went well for the Swedes with the enemy spotted at the first opportunity and as far away as possible.
The patrol was thus able to turn and retire to their lines without panic, especially as the Russian response was tardy and halted in the gap between the edge of the woods and the Klein Wilzen. Here they could see the entire Swedish army drawn up for battle. The rest of the Russian army was informed and duly advanced to meet the enemy. The Russians were soon disordered by the woodland and rethought their battle plan. Why not pull back to their side of the woods and let the Swedes fight their way through disordered and disjointed? Kropotov’s Dragoons would delay the Swedish horse on the Russian left with the support of the Cossacks who could pick their way along the marshy banks of the Klein Wilzen. On the other wing Ignatyev’s Dragoons could cover the road exiting the woodland whilst Bauer’s Dragoons could cross the shallow Schwedt and threaten the Swedish flank.

5

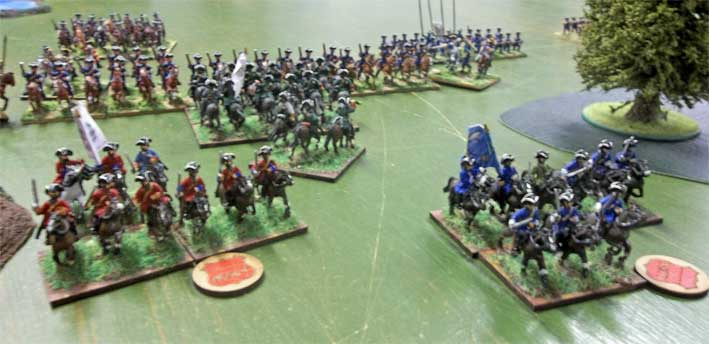
The Swedes had expected the Russians to attack, but a stand-off would still give the enemy victory as they would still hold the road north to safety and supplies. The Swedes thus decided to take the battle to the Russians. Another opportune die roll revealed Bauer’s attempted flank move across the Schwedt to the Swedes. They sent just one unit in column along the road into the woods to hold the route north, whilst Wennerstadt’s other units shadowed Bauer’s moves on the opposite bank of the river.

6

On the Swedish right Schreiterfeldt’s and Kropotov’s commands clashed. The Swedes soon came out on top with their only casualty falling to a lucky carbine shot from the Cossacks. Kropotov’s Dragoons were soon in flight and reserves had to be brought across from Ignatyev’s command. On the other side of the table the Russian and Swedish cavalry had spent a couple of moves facing off across the river. With things going badly on the other wing the Russians had to make a move. They would be disordered crossing the river, be mostly outclassed, and have to survive the initial Swedish impact. But they had numbers on their side and maybe that would be decisive. It wasn’t. The first unit to engage fought well for a couple of rounds but eventually routed and lost their general. Reaction rolls from the remaining Russian Dragoons were dire and they soon followed.

7

With both wings routing and the Swedish infantry picking their way through the woods the Russians wanted to concede. We persuaded them to carry on a while. The Swedish infantry would emerge from the woods piecemeal, to be met by fresh Russian infantry and artillery. As the first unit came into the open the Russians gave it everything. The Swedes came through unscathed and took out the first Russian infantry battalion in the impact and ensuing melee. There was no way back for the Russians now and a decisive victory was awarded to the Swedes.
Almost all of the historical account is based on ‘The Russian Campaign in Courland in 1705’ by Vladimir Velikanov and Sergei Mekhnev in ‘Great Northern War Compendium’ volume 1 by THGC publishing 2015. An invaluable piece of work on what is still an underrepresented conflict in the English language and on the tabletop.

Godendag 2017

GODENDAG 2017

15MM ANCIENT/MEDIEVAL/RENAISSANCE DOUBLES COMPETITIONS

28TH & 29TH JANUARY 2017


NEW VENUE:
Firestorm Games (Cardiff) (Tel: 02920 227117)
Trade Street
Penarth Road
Cardiff
CF10 5DT
United Kingdom

Mortem et Gloriam

Any published army
The list submitted must not exceed 12000 points.
Umpire and list checker: Alasdair Harley

alasdairharley@hotmail.com

Field of Glory: Ancient/Medieval

THE MEDIEVAL WORLD

Any army from 600 AD.
The list submitted must not exceed 900 points.
Umpire and list checker: Richard Bodley Scott.

rbs@byzant.demon.co.uk
Rules: See below

Field of Glory: Renaissance

EUROPE’S TRAGEDY

Any European army 1618-1648 (including Russia and Turkey).
The following list modifications and additional restrictions will apply:

To represent usual historical proportions in European armies of this period, ignoring artillery, the army cannot include more than 1 battle foot unit more than it has battle mounted units. (e.g. If you have 5 BGs of mounted battle troops, you can have up to 6 BGs of foot battle troops).

No more than half of all mounted battle troops can be Superior or Elite. Armies with insufficient Superior mounted battle troops in their army list to achieve this limit can upgrade whichever type of Average mounted troops in their list is most expensive in points to Superior to achieve the above limit.

No more than half of all foot battle troops can be Superior or Elite.
The army must have at least 6 bases of foot battle troops per heavy or medium artillery base.

The list submitted must not exceed 900 points.
Umpire and list checker: Richard Bodley Scott. rbs@byzant.demon.co.uk
Rules: See below

DBM

Any army. List not to exceed 500 points.

Umpire and list checker: John Graham-Leigh

jandagraham-leigh@blueyonder.co.uk

L’Art de la Guerre

400 points doubles, made up of 2 x 200 point armies (each army must be no more than 210 points with a total combined army size of maximum 400 points). The armies chosen must be listed as potential allies in either army list.

Armies drawn from Ancient Period, Classical Period and Roman Period lists (1-124 inclusive)

4 Games, same games times as the other periods

Umpire and list checker: Mike Baldwin

———————————————————————-

Cost: £ 25.00 per team of 2.

(Food will be available on site, but is not included in the entry price).
Tickets are available from Firestorm’s web site: http://www.firestormgames.co.uk/events

CONTACT: RICHARD BODLEY SCOTT, 28 PRIORY GARDENS, USK, MONMOUTHSHIRE, NP5 1AJ (RBS@BYZANT.DEMON.CO.UK)

———————————————————————–

GODENDAG 2017
VENUE:
Firestorm Games (Cardiff)
Trade Street
Penarth Road
Cardiff
CF10 5DT
United Kingdom
Tel: +44 (0) 2920 227117


TIME: 8.30 – 9.00 – Registration time on Saturday

Games will be:

Saturday: 9.30 – 1.00 and 2.00 – 5.30
Sunday: 9.00 – 12.30 and 1.30 – 5.00

ENTRANCE: £ 25.00 per team of 2. (Food will be available on site, but is not included in the entry price). Tickets are available from Firestorm’s web site:

LOCAL ATTRACTIONS:

If you are able to make a long weekend of it, there are numerous local historical attractions relevant to our period. These include the Roman Legionary Fortress and Museum at Caerleon and the Roman walled city of Caerwent. Among the many local castles, the best are Chepstow, Raglan, White Castle (at Llantilio Croesenny) and Caerphilly. Caerphilly castle has a permanent exhibition of full size working medieval siege engines including ballista, mangonel, trebuchet and perrier. The Welsh Folk Museum at St. Fagans is worth a visit. The Brecon Beacons National Park and the picturesque Wye Valley are also nearby.

QUERIES: Richard Bodley Scott, 28, Priory Gardens, Usk, Gwent, NP5 1AJ. (rbs@byzant.demon.co.uk)

————————–

FOGAM/FOGR TOURNAMENT RULES

1) Godendag is a Doubles competition. Each army is to be commanded by 2 players. Consideration will be given, however, to entries with only one player or three players if there are special circumstances.
2) The rules to be used are the current Field of Glory rules, together with the latest errata and FAQ posted on the official Field of Glory web site.
3) The competition will use the full rules including the terrain and set-up appendices. There will be no formal division of the battle groups comprising each army between the members of a team. It is usual, however, for each player to take control of the troops on about half of the battlefield.
4) The scoring system will be the standard FOG tournament scoring system, where 25 points are up for grabs each game.

5) Army lists must specify the number and size of battle groups and their order of march for deployment, and the number and type of commanders chosen. They should also include the total pre-battle initiative modifier and the territories list for the army. If the detached shot option is to be used, a second list differing only in this regard must be submitted. Once an army list has been submitted it may not be changed or altered other than to correct any errors. Players may only correct their errors by making reasonable changes to their list. It is not allowed to completely re-write the list, and the list checkers decision on this is final.
6) Please note that the Godendag 2017 Field of Glory event is a single list format. Any incorrect list discovered after a game has commenced (after set up dice have been rolled) must be corrected prior to deployment if spotted in time, and fully corrected in any case before the next match.
7) Army lists must be submitted for checking in advance and must be received by the Tournament Organiser by 14th JANUARY 2017.
8) The Tournament Organiser and List Checker is Richard Bodley Scott (rbs@byzant.demon.co.uk) 28 Priory Gardens, Usk, Monmouthshire, NP5 1AJ.
9) Players must fully define their troops as they are placed on table. Figures must provide a reasonably accurate representation of the troops they are trying to represent – they must not look deliberately misleading.
10) Table size is 6′ x 4′ and players must supply their own terrain pieces. These must be to an acceptable standard, and umpires will have the discretion to remove unsightly items. In addition all figures must be representative and painted and based to an acceptable standard.
11) Players must be present and ready to start the match at the appointed time. Where a player has a reasonable excuse for arriving late the match start will be delayed by up to 30 minutes. After which time the affected player will be awarded a bye. No player will be awarded more than one bye for any reason.
12) If a player resigns from a game at any stage after the first set up dice have been rolled their opponents will be awarded maximum points, and they will be awarded 0 points.
13) Time will be called after 3 hours 20 minutes plus up to 10 minutes. Play will stop at the end of the current phase. Players may always commence games earlier than the stated time by mutual consent, in which case their game continues until time is officially called as normal.
14) Admission to the tournament is at the sole discretion of the organisers and their decision on all matters is final. CONTACT: Richard Bodley Scott, 28 Priory Gardens, Usk, Monmouthshire, NP5 1AJ

TO HELSINGBORG AND BACK

The latest FOG:R refight involving the Swedes and Danes took place at the club recently. Helsingborg was a little different from most of these encounters as the Swedes were not heavily outnumbered and the Danes were not heavily outclassed.

helsingborg

The superbly confident army that Charles XII had led deep into Russia had been destroyed at Poltava in 1709, and their inspirational king was in exile in Turkey. The Danes saw another chance to reclaim their lost provinces in southern Sweden. They had been forced out of the Great Northern War early on, but had been far from idle. They had loaned out many troops to the maritime powers of Britain and the United Provinces and they had seen action in Ireland, Germany and Spain.
At the end of 1709 the Swedes had only around 1,500 troops available to counter any Danish attack. The Danes assembled an invasion force of 14,000 and rapidly took all of southern Sweden apart from Landskrona and Malmo with the latter under siege. Under General Stenbock the Swedes raised and trained a new army over the winter of 1709/10, and by early February he was ready to make a move on Helsingborg to try and cut the Danish supply lines.
Fearing being trapped between the Swedish army and the Malmo garrison the Danes marched towards Helsingborg where they could pick up reinforcements. On the freezing, foggy morning of February 28th the two forces met outside the town. The Swedes had around 8,500 infantry and 5,500 cavalry; the Danes around 10,000 infantry and 4,000 cavalry.

helsingborg2

The fog had hidden each side’s dispositions from the other. The Danes had their cavalry wings (including some infantry and mounted dragoons) on high ground, with their infantry in two lines on the low ground in between. The Swedes had also formed up with two infantry lines in their centre and two equal cavalry wings. They advanced across low lying marshland, cut with ditches and stone walls, but the frozen ground lessened the difficulties these could have presented. When the fog lifted they also found they outflanked the Danish left and were approaching at an angle, with their right wing far closer to the Danish line than their left.

helsingborg3
The Danes rushed to reinforce their left to avoid being outflanked but the main enemy advance came on the right as the Swedes swung round to line up against them. This meant the Swedish left wing cavalry moved well out further to the left, potentially cutting off the road to Malmo. The Danish general Rantzau (a veteran of Marlborough’s campaigns) rushed across and took personal command of the right wing, ordering them down from the high ground to counter this perceived threat. At first the Danes were successful, but Swedish reinforcements and a serious wound to Rantzau turned the tide.

helsingborg4

Rantzau’s advance had also opened up gaps in the Danish line as their infantry were unsure whether to hold their position or advance. As the Swedish infantry advanced to engage them rumours spread amongst the Danish army that they were being encircled and panic set in. Their Guards and Grenadiers fought well to cover the retreat of the rest of the Danish infantry, but the left flank was now under threat as well. Here the commander von Dewitz had also been ordered across to help on the opposite flank and the now leaderless Danes soon succumbed to the ferocious Swedish cavalry attack.
The retreat became a rout and the Danes ran in headlong flight back to Helsingborg where they were besieged by the Swedish army.

helsingborg5

They were eventually forced to abandon the city in early March having lost over half of their invasion force and their final attempt to regain their lost provinces in southern Sweden.

In the club refight the commanders were:
Swedish right wing cavalry: Steve 
Swedish infantry centre: Richard
Swedish left wing cavalry: Pete
Danish left wing: Paul
Danish centre: Simon G
Danish right wing: Dene

Although the Swedish army had been raised more or less from scratch it was still trained in the usual tactic of impact cavalry and salvo infantry. Not all of the new Swedish infantry regiments were provided with pikemen. To simplify matters the front line were classed as mixed units and the rear line as all musket.

helsingborg8
The Danish may have had some artillery on the heights on their left flank, but it had to be repositioned when the Swedish deployment was revealed and did not play a major part. As it can have a significant effect in FOG:R (especially on cavalry) I gave the Danes a couple of guns in reserve behind the heights. This kept it out of immediate use but could be deployable if the Swedish cavalry swept round the flank. The Danes also had the only superior infantry on the battlefield – the Guards and the Grenadiers.
The Swedes began the game with a compulsory double move to swing their left wing round to line up more with the Danish right wing – as happened historically. However their cavalry did not move too far out to the left, preferring to keep in close contact with their infantry, and their right wing cavalry also advanced to try and take an early advantage. The Danes responded with a large and frantic redeployment on their left and centre to reinforce the heights and prevent a Swedish flanking manoeuvre. On the right there was no immediate threat so Rantzau was not forced to move across and the Danes held their position on the hills.

helsingborg6

The right flank Swedish cavalry edged round the flank of the Danish positions, forcing them to turn to face. If this flank was to be successfully turned it would need an uphill charge. Steve duly obliged in the Swedish ‘ga pa’ style. Meanwhile the Swedish centre and left flank advanced steadily, the cavalry still keeping close to the infantry. This gave the Danish right a chance to threaten the Swedish left flank and they duly came down from their hilltops to engage. The Swedish cavalry now turned and swung out to their left to meet this threat. This could have triggered Rantzau to rush to the right flank and take personal command as happened historically, but events on the left flank took precedence.

helsingborg7

The Danish dragoon unit on the extreme left chose to pull back and secure the flank rather than engage in melee. The rest of their horse struggled to hold the Swedish cavalry who had great success with their initial uphill charge, winning most of the impacts. Much of this was visible to the Danish infantry next in line on the hill and rumours spread of a collapse on the left flank (in the shape of a failed cohesion test). This triggered Rantzau’s rush to take command of the left flank rather than the right. The situation was eventually stabilised and turned round on the Danish left as the Swedish cavalry ran out of steam and collapsed when their general was killed.
On the other wing the Swedish cavalry again had the best of the early melee, even fragmenting the Danish Guard cavalry, but here too the Danes eventually got the upper hand and the Danish Guard distinguished themselves by rallying up twice.

helsingborg8
The Swedish infantry in the centre had continued their advance on the Danish centre, still in perfect order with the lack of any enemy artillery fire. As they closed the withering fire of the Danish muskets and battalion guns broke three of the Swedish units in the front line but the other three passed all their tests and charged in. In the impact the Danish Guard were routed and the adjacent unit panicked and followed in the next melee round. With both cavalry wings losing out and the evening’s gaming drawing to a close continued Swedish success in the centre was vital. The last Swedish unit was led into melee by Stenbock in person; they were held to a bloody draw and with the last dice roll of the evening the Swedish general fell and victory was awarded to the Danes. It was the Swedes who had been to hell and back.

Battle of Sekigahara – after the battle!

Battle of Sekigahara, (Oct. 20, 1600), in Japanese history, conflict that established the hegemony of the Tokugawa family, a hegemony that lasted until 1868.

Sekigaharascreen

The chief contenders for power in Japan at this time were Tokugawa Ieyasu (Red markers in the game) and Ishida Mitsunari (Blue markers in the game), both of whom were members of a delicately balanced oligarchy that had been established by the former national leader Toyotomi Hideyoshi to keep Japan united under his descendants. When Hideyoshi died leaving only an infant son, Toyotomi Hideyori, to succeed him, Ieyasu, as head of the regency council for Hideyori, began to assume power. Ishida, another member of the council, challenged him, and two great armies of feudal lords faced each other at Sekigahara, a strategically located narrow pass between the two plains at Lake Biwa and Nagoya. Ishida and his allies were defeated; he was executed; and most of the lords who had supported him were either banished or deprived of their domains.

Immediately after his triumph, Ieyasu began a redistribution of fiefs to consolidate his rule, establishing the machinery for the 265-year Tokugawa shogunate, or military dictatorship, of Japan.
We refought this battle as a one day game. As events would have it we ended up playing the game twice over the course of the day.

To avoid it being a straight recreation of the historical events and make it more of a game I changed some of the events that occurred to give both sides more of a chance. The mechanism for this was a ‘pot’ of dice that would accuse each turn. Each time that each side did something positive then a dice would be added to the pot. The positive events were –

  • Killing and enemy base
  • Causing a cohesion drop
  • Rallying a cohesion state

Each turn 3 dice would be added as a ‘default’. This would always give a 50% of each player being able to remove a counter each turn)

At the end of each turn the pot of dice would be emptied and thrown, each 6 rolled could be used to increase the  ‘activation’ of troops that at this point were taking no part in the battle. Each pool of reinforcements had a pool of counters indicating there indecision or tardy action. Each 6 rolled could remove one of these counters. When all the counters were gone then those troops would activate.

Outside of the main battle we had the following re-enforcements.

Loyalist Turncoats. (4 red, 4 blue, 2 white counters)

In history the defection of Hideaki was the key event of the battle. I allowed an even chance that he would join either side. Therefore it had 4 loyalist(blue), 4 rebel (red) and 2 white. The white counters could be removed by either player but could only be removed when all the counters of their own colour was gone. When the last white counter was removed then Hideaki would activate under the command of the team removing the last counter

Ieyasu (5 red army counters, 2 red general counters)

To simulate his inaction on the day he had 7 counters to be removed. 2 to get the great man to join to fray personally and 5 to commit his troops to battle

Hidemoto (6 blue counters)

This was a deviation from history as Hidemoto took no part in the battle as he was deployed on the far side of Mount Nangu, threatening the rear of the rebel army and was the back door of the trap that Mitsunari was trying to spring. The removal of the hist counters represented his movement back across the mountains to bolster the loyalists. This was added just to give the loyalists more of a level playing field, and try an capture a feeling of the ‘unknown’ that occurred in the battle.

There were a couple of minor events too

Fukishima (1 red counter)

Representing his inaction following his slight after the honour of leading the attack was stolen by Naomasa

Yukinaga (2 blue counters)

Representing his inaction on the day

So a total of 12 each.

As the game started it would be a slow build up as each side would only get 3 dice, and events wouldn’t be triggered too quickly. As the armies engaged this pot of dice could grow up to 12 dice ,thus accelerating activation of troops on the side that were performing well.

The rules for battle were using the Field of Glory :Renaissance rules. There were a few tweaks that were made. The armies were drawn up from the orbats that are dotted around the internet and the maps and dispositions of the forces from the Osprey book. The combatants on each side were about 85K troops and we used a scale of 1 base = 500 troops (with a bit of rounding for flavour).

Red

blue

Each samurai lord would be represented on the battlefield (as a named flag) , mostly where a force was less than 4000 troops that would be a single battle group. I allowed the troops in the battle group to be mixed. So there was a representation of Samurai and Ashigaru spearman and Arquebusiers. The lord would be integral to the BG so it would always benefit from his ‘command’  – but not for the ‘fighting in the front rank bonus’. I also allowed a tweak for the spearmen to ‘protect’ the bow and arquebus in the BG. What that meant really was they there were very few POA in combats , as most troops were the same. It was kept simple to manage the 200+ bases per side that we would have to manage. The only chrome was that the samurai would re-roll the 1’s (being superior). Which just meant keeping those dice a separate colour. It seems to work well enough.

I allowed Arquebus to fire 4” and all the foot moved 3” as a rule.

The brief of the Loyalists started to enact the trap box the rebels in. Secondary was to keep the pass blocked and that Mitsunari would survive.

The brief of the Rebels was to break through the pass, and destroy the loyalist army.

sekigahara1

Game 1 with the troops array for battle. The table was a 10′ x 6′ L shape. You can just see Hidemoto on a separate table (behind Simon) making his way across the mountains

We ended up playing this game twice. The first one took just under 2 hours to play.

sekigahara2

You can see here that the Hideaki turncoats flags turn yellow with indecision

This was as a result of Pete playing the part of Mitsunari having his command position crumble away in just of over 4 turns. This was a rather unfortunate series of events where a handful of arquebusiers were potting away at some troops behind barricades. This in game terms was 3-4 dice needing 5s to hit, causing a single casualty and then Pete throwing a 1 to lose a base. There was 1/18 chance of this happening each turn. Pete managed this 4 times in a row. This caused quick breaks … this also meant that the Rebels pot of motivation dice green quickly and they activated Hideaki to the the rebel cause quickly.  Mitsunari committed his troops to leave their uphill positions and charge downhill to throw the rebels back over the bamboo barricades , but that simultaneously failed also through atrocious dice.

sekigahara6

With the turncoats activated and a breakthrough achieved we called it there as there was no chance that the Loyalists would fight back from this position.

sekigahara5Break through over the barricade to the Mitsunari’s command post complete ! the game is up


sekigahara3

After a break for lunch we reset the game an played again.

sekigahara10

so says Ian, will this take longer that 90 minutes?

Teams were reversed and it was a chance for honour to be restored.  The second game played out a lot longer.

sekigahara7

Naomasa charges bravely uphill but is swiftly defeated

Naomasa and his red devils did charge up the hill , but were swiftly routed. This did draw out some of the Hideie’s troops from their uphill positions.  Steve this time in change of Mitsunari held like a stonewall against all that Wayne and Pete could throw at him. This time the arquebus shooting was irrelevant , and the fighting in the pass was fierce. The loyalists has committed all their reserves but they did hold.

sekigahara11

This fierce fighting meant the pot of dice for activation did grow quickly and both sides jockeyed for Hideakis’s troops. As most the coloured countered had been removed there was some strategic choice of whether of not to remove the last white counters, as I made them alternate spending the dice based on the phasing team. It got down to the white… but in an imperious turn of combat the Reds received a boatload of dice and convinced Hideaki to join the rebels for a second time that day.  The fighting was fierce and soon all troops were active Ieyasu and Hidemoto had entered the rear of the field.

sekigahara9

The end of the loyalist line was beginning to crumble again as the turncoats collapsed the flank. But the centre was holding. The 17000 troops that Hidemoto were just a little to few and a little too late, and it looked like the Reds would carry the day a second time. However, when we called time, and night fell on our Autumnal Japanese battlefield, the loyalist line still held and so a minor victory was awarded the loyalists for holding on in the face of overwhelming odds.

The teams were –

Wasabi peas and 1’s

  • Wayne
  • Lynnette
  • Pete
  • Dene

Rice cakes and 6’s

  • Steve
  • Andy
  • Ian
  • Simon

So congratulations to Steve, Andy, Ian and Simon as the morning rebels slaughtering all in front of them, and then holding on in the afternoon as the loyalists in the face of really overwhelming odds!

a resounding 2-0 !

Thanks all for taking part and entering the spirit in which the game was attended!

sekigahara12

samurai