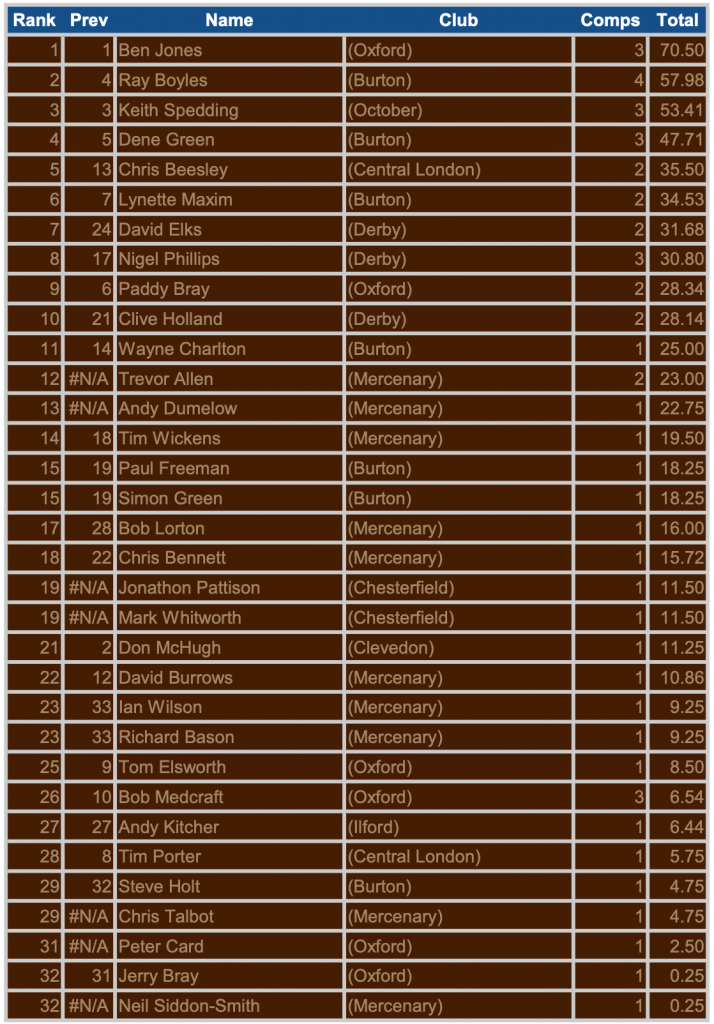
FoG:R rankings

Being an account of the BAD War-games Club’s refight of Cropredy Bridge at Partizan in Newark, in May 2017.
The “smart battaile” at Cropredy Bridge, which was fought on Saturday, June 29th, 1644, was one of the Royalist highlights in the Civil War campaigns of that year. Fought only three days before the shattering Northern defeat of the hitherto invincible Prince Rupert at Marston Moor (July 2nd), by which it has been overshadowed, but the favorable consequences of this victory for the Cavaliers’ fortunes in the South were of even greater far-reaching importance.

Background to the Battle
On June 6th, 1644, in a meeting between the Earl of Essex and Sir William Waller, it was decided by Essex that in addition to crushing the King’s Army when it had slipped out of the Royalist capital at Oxford as the two armies of Essex and Waller closed in, the task of relieving the town of Lyme Regis, which was besieged by King Charles’ younger nephew, Prince Maurice, and his Army of the West, was of equally pressing importance. The Earl of Essex then decided that he would proceed with his army to relieve Lyme, while ordering Sir William Waller to continue pursuing the King’s Oxford Army, and attempt to bring it to battle and crush it once and for all (it is important to note that at this time the King’s Oxford Army was not as strong or large as it would later become prior to the battle of Cropredy Bridge).
In mid-June 1644 the King marched his army to Witney where he met the Oxford garrison, absorbed it into his field army and moved on across Oxfordshire.
On 28th June 1644 Sir William Waller was near Banbury with his Parliamentary army while the King was at Brackley in Northamptonshire. Hearing of Waller’s approach, the King marched back to Banbury to seek battle with Waller. Each side took up a strong position on either side of Banbury and skirmishing began in an attempt to bring the other to action on favourable ground.
The Battle of Cropredy Bridge
After a day in position, at around 8am on 29th June 1644 King Charles I set his army marching away from Banbury on the road towards Daventry to the north, his purpose being to draw Waller away from the favourable position he was occupying. The Royalist advance guard was commanded by the Earl of Brentford (newly elevated from the title of Lord Forth). The King led the main army. The cavalry brigades of Lord Cleveland and Lord Northampton with 1,000 Foot formed the rearguard.
Soon afterwards Sir William Waller’s army set off following the Royalists by marching north along the road to the west of the Cherwell river which led to Southam. The two armies were marching north on parallel roads. Both armies comprised about 9000 men,
Waller reached Bourton Hill, on which are Little and Great Bourton villages, three miles to the north of Banbury. From this vantage point Waller could see the Royalist army on the far side of the River Cherwell approaching a point level with Cropredy.
The Cherwell could be crossed in the area at three points; a ford at Slat Mill immediately to the east of Great Bourton village; Cropredy Bridge to the east of Cropredy; and Hay’s Bridge to the north east of Cropredy on the Daventry road.

In order to secure his flank King Charles I detached a party of Royalist Dragoons to hold the Cropredy Bridge and Ford until his army had passed. At about the same time the Royalist advance guard was ordered to press on and cross Hay’s Bridge to intercept a force of Parliamentary Horse that was reported to be approaching from the north with the intention of joining Waller’s army.
The effect of the King’s order was to speed up the rate of march of the advance guard and the main body. The rearguard was unaware of the change and continued at the previous pace so that a gap opened between it and the main body. From his vantage point on Bourton Hill Sir William Waller observed the gap opening between the rear and main bodies of the King’s army and resolved to cut off the Royalist rearguard.
At around 11am Waller moved with 1,000 musketeers to Slat Mill ford and dispatched Lieutenant General John Middleton with a mixed horse and foot command to Cropredy.
Middleton’s Horse dispersed the Royalist Dragoons holding the Bridge and attacked the rear of the Royalist main body pursuing it as far as Hay’s Bridge where they were finally checked by musketeers positioned in the road behind an upturned cart.
At the rear of the Royalist army Waller was across Slat Mill Ford when he was fiercely attacked by Lord Northampton’s four regiments of Horse and the Parliamentary musketeers driven back across the Cherwell River. The other brigade of the Royalist rearguard, Lord Cleveland’s, did not wait for orders but charged the Parliamentary Foot that had crossed at Cropredy as part of Middleton’s force and threw them into disorder.
Meanwhile the advance guard and the main body of the Royalist army had halted on the north side of the Hay’s Bridge crossing point. Lord Bernard Stuart with the King’s Life Guard re-crossed the river and attacked Middleton’s regiments of Horse, which had returned to counter-attack Lord Cleveland in flank, driving them back to Cropredy Bridge.
The remnants of General Middleton’s Horse and Foot was driven back across the Cherwell into Cropredy, while a force of Parliamentary artillery comprising fourteen guns and the commander Colonel Wemyss was overrun and captured on the east side of the river by the triumphant Royalist Horse.
The main Royalist army had re-crossed the Cherwell at Hay’s Bridge and now assembled in the village of Williamscot on the Cropredy road. Waller withdrew his troops to Bourton Hill leaving the crossings manned by Dragoons and Foot where they were subjected to a full attack by the Royalist army.
The Tower Hamlets Regiment of the London Trained Bands and the Kentish Regiment supported by two small drake canon held Cropredy and repelled the attack.
Towards the end of the day’s fighting King Charles I sent a message to Sir William Waller inviting him and his army to submit and return to their allegiance to the Crown. Waller replied that he had no authority to negotiate on behalf of Parliament.
The Royalist army remained in position during the next day, but on the following day receiving a report that Major General Browne had arrived in Buckingham with 4,500 Parliamentary troops and was marching to join Sir William Waller, the Royalist army left the severely mauled Parliamentary army on the battlefield and marched westwards towards Evesham.
The Refight
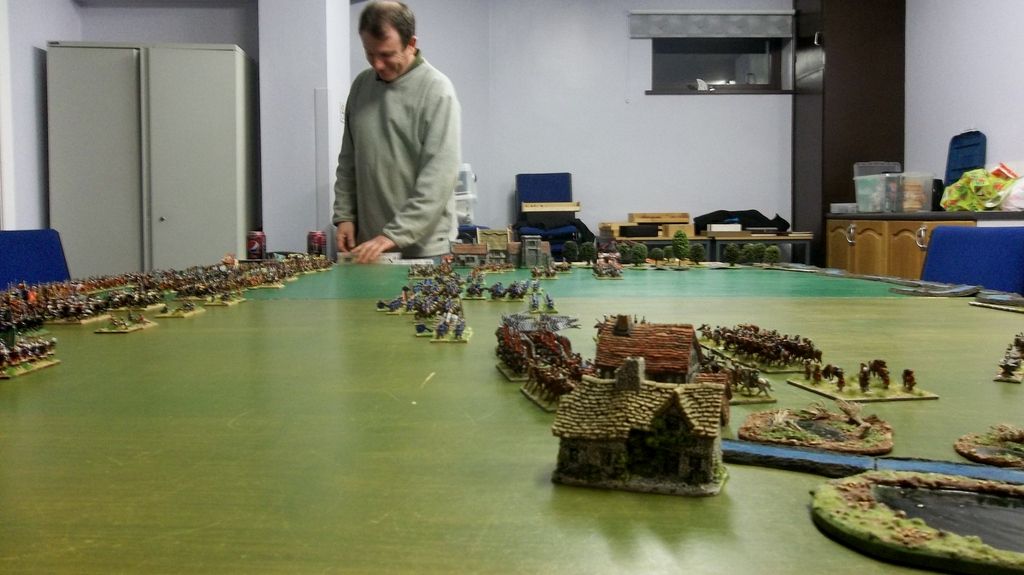
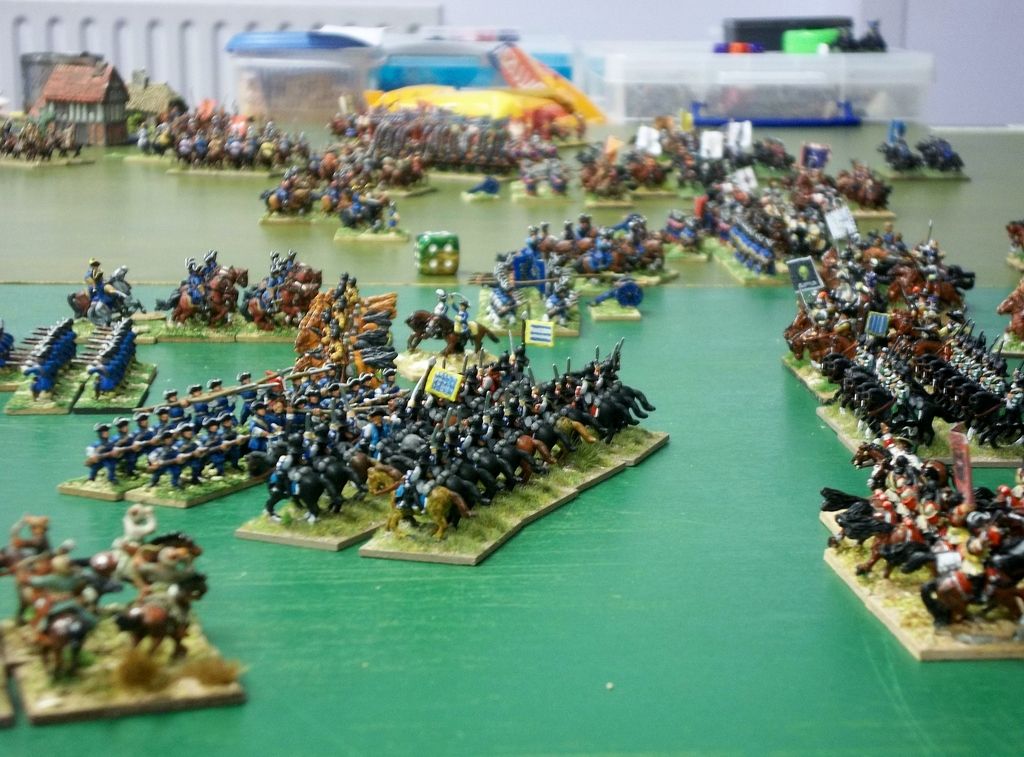
The battle was a refought by the BAD Club at the excellent Partizan show in Newark in May 2017.
It was refought in a 25mm scale, using largely Warlord plastics, but with a lot of older metal figures as well. Rules used were Field of Glory Renaissance.

Many of the Club helped out with the game, big shout out to Ray Boyles for putting together some excellent interpretation panels.
The key players were:
Early parts of the refight went largely as anticipated:
(1) Middleton drove North, almost reaching Hay’s Bridge but being stopped by some determined Royalist infantry

(2) Initial attempts by Waller to move north from Slat Mill were frustrated by Northampton

(3) The London Brigade took up a strong position both sides of Cropredy Bridge.
But then the pace of the battle changed. Cleveland and Northampton’s cavalry shot their bolt and retired north. Similarly Middleton, once repulsed, fell back behind the London Brigade. The latter went on the offensive, routing isolated units of Royalist foot. And during this time both Waller and the Kind were bringing the bulk of their armies to bear for the conclusion.
Alas, there was no conclusion! As the main armies lined up to face each other, night fell, leaving the outcome inconclusive (although in truth Parliament had performed better than their historic counterparts).
A fun re-enactmen, and one I’d be pleased to refight again!


The Swedish army had had some remarkable successes in the early stages of the Great Northern War. They had defeated Saxon, Russian and Polish Commonwealth forces in pitched battle on several occasions. By early 1704 they were able to put a pro-Swedish force of Polish nobility together and elect a puppet king, Stanislaus Leszczynski, to the Polish throne.
Large numbers of the Polish nobility opposed the imposition of Stanislaus upon them and formed a rival confederacy to support the Saxon King Augustus as the still legitimate ruler of the Polish-Lithuanian Commonwealth. They made alliances with Saxony and Russia for military and financial support, and relied on hit and run raids rather than pitched battles to frustrate their enemies. Despite their military superiorities the Swedish found they were unable to effectively rule any territory they captured.
In late 1705 the Russians and Saxons went on the offensive again in Lithuania, but Charles XII main Swedish army surrounded them at Grodno. Augustus of Saxony managed to escape with some of his forces but the bulk of the Allied army was trapped in the city. Augustus called for Saxon reinforcements under General Schulenberg but this relief army was destroyed at Fraustadt in February 1706 by the Swedish General Rehnskold’s army. The much reduced Russian forces still trapped in Grodno eventually made a break out in early April and made it back to Russian territory.
These outstanding Swedish successes still failed to give Charles XII full control over the Polish-Lithuanian Commonwealth. Saxony and Russia still opposed him and gave support to the anti-Swedish Sandomierz Confederation whose guerrilla tactics continued to cause problems. Charles decide to take a more direct approach to knock Saxony out of the war. As he couldn’t effectively defeat Augustus in Poland he would take the war to him and invade Saxony itself.
This brought Augustus to the negotiating table and he agreed to cede the Polish Crown in return for the withdrawal of Swedish forces from Saxony. He was also supposed to cease all contacts with the Russians and remove their forces supporting him in Poland. But at the same time Augustus was also negotiating with the Russians and his Polish allies to continue the war against Sweden, and kept his treaty with Sweden secret from them to guarantee their support.
This led to a large Saxon, Russian and Sandomierz Confederacy force assembling at Lublin and marching toward Kalisz where a small Swedish force was garrisoned, supported by pro- Leszczynski Polish forces. Augustus did not want to upset the Swedes by blatantly breaking his treaty with them, so he sent a message to Mardefelt, the Swedish commander at Kalisz. He outlined the terms of his agreement with Charles XII and informed him that he would delay the advance of his army until Mardefelt could safely withdraw his forces without loss of life or honour.
Mardefelt, having no other confirmation of this so-called treaty, refused to believe Augustus and remained at Kalisz. By the time he did receive confirmation of the treaty terms from Charles XII it was too late for him to withdraw and he found himself surrounded by a vastly larger Allied army.
Mardefelt considered his options. Kalisz itself was poorly defended and he lacked sufficient supplies to withstand a siege. He therefore decided to take the battle to the enemy and meet them on the open field. He chose a position with a restricted frontage so enemy numbers would not count so much, with his right flank secured by forest and his left by a marshy stream. A fortified camp was built to the rear of the Swedish lines just outside Kalisz. Here the ammunition and other supplies were kept, along with high ranking non-combatants.
The Swedish forces, less than 4,500 strong, drew up in 2 thin blue lines in the centre of the battlefield, the first line containing 4 infantry battalions and 15 cavalry squadrons and the second 2 infantry battalions and 9 cavalry squadrons. Their Polish allies, numbering 9-10,000, were split more or less evenly and positioned on each flank of the Swedish line.
The Allied army, all mounted, numbered some 34,000. The Saxons (9 Cuirassier and 5 Dragoon regiments) and Russians (almost all Dragoons) faced off against the Swedes. Their Polish allies of the Sandomierz Confederation also numbered around 10,000 and were split and positioned on each flank so that they faced off against the pro-Swedish Polish. Another 10,000 Cossack and Kalmuck cavalry patrolled the far bank of the River Prosna to cut off any enemy line of retreat.
The few cannon on either side opened up to begin the battle, before the Swedish cavalry went onto the attack. They were initially held but a second assault with infantry support made some headway, especially against the Russians. A Saxon counterattack soon steadied the line and the Swedish advance stalled.
On the Swedish wings the pro-Leszczynski Poles attacked their opposing numbers but were soon struggling. The right wing was the first to break when a small force of Polish cavalry and Saxon Dragoons emerged from woodland to outflank them and threaten the wagon camp. The left wing followed soon after, fleeing towards Kalisz and trying to force their way over the river and through the Cossack patrols.
With both flanks gone the Swedes were soon surrounded. Russian and Saxon cavalry moved to encircle them and artillery was brought up to pound them at close range. About 1,000 Swedish cavalry did manage to break out and flee to Posen, but the bulk of the Swedish force was captured. Some of their Polish allies made a last stand in the wagon camp but were forced to surrender the following morning, whilst few of those who tried to escape across the Prosna evaded death or capture.
To avoid antagonising Charles XII over his duplicity and breaking of his treaty with him Augustus released most of the captives from Kalisz, upsetting the Russians who had hoped to bargain for the release of their own prisoners of war. He also refused to reclaim the Polish crown and instead returned to Saxony in case the main Swedish army pressed on with its threatened assault on his kingdom. The Swedish puppet Leszczynski thus remained as king, but the Russians continued their support for the anti-Swedish forces in Poland and the civil war in the Commonwealth dragged on.
At first reading it may seem too much of a one-sided affair for a club re-fight. But the Swedes had some quality troops on their side. The Swedish Horse (Superior and Impact in the main) had the potential to make a big dent in the opposition cavalry, especially the unarmoured Russians, if the initial contact went well. They also had the only regular trained infantry on the battlefield with the all-cavalry enemy unable to trade off in any small arms fire, potentially goading them into reckless charges to avoid the constant sniping. This relied on the wagon camp and ammunition supply staying out of enemy hands of course! Two of the Infantry battalions were made up from Swiss and French prisoners of war pressed into Swedish service. I assumed these were the ones placed in the second line and classed them as average and all musket armed. I did not expect the Swedes to gain the field, but thought a break-out was possible with a significant part of their army. To encourage this and reflect their early successes in the historical battle I allowed any positive casualty difference in the Impact Phase by the Swedish cavalry to result in a pushback. For example, if the Swedes won the Impact 4:2 the enemy would be pushed back 2 MU’s.
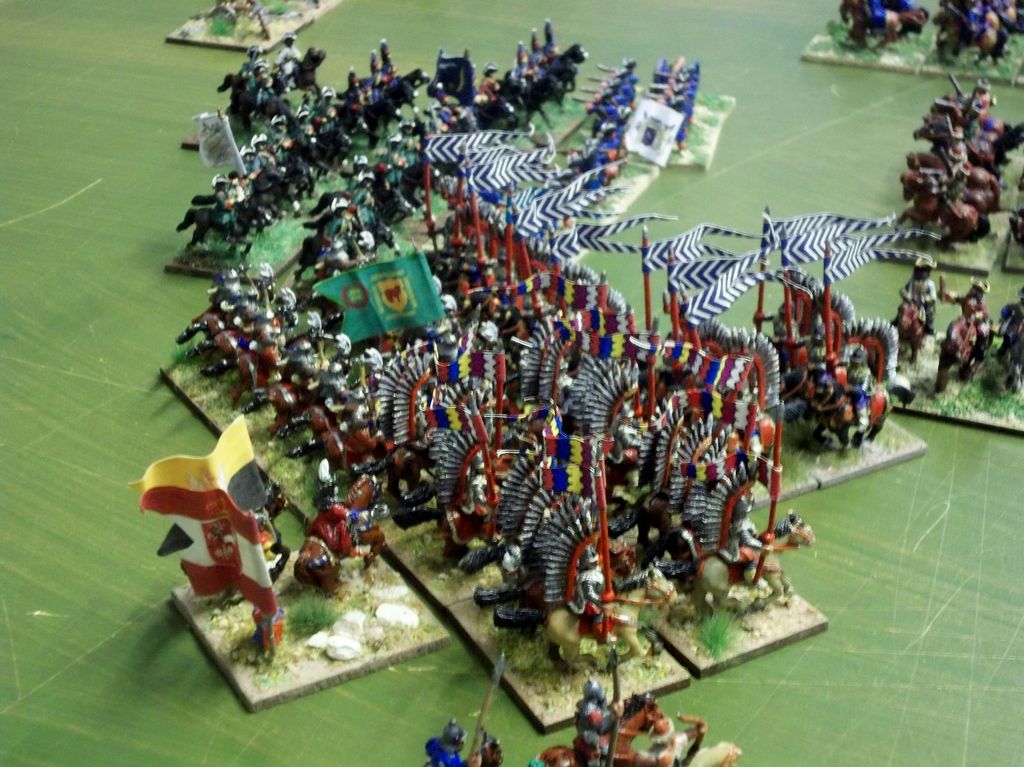
Seven club members took part in the re-fight. Wayne took the Swedes in the centre, supported by Lynette’s Polish allies on the right flank and Simon C’s on the left. They were opposed by Pete (Russian) and Simon G (Saxon) in the Allied centre, with Steve’s Poles on the left flank and Dene’s on the left.
The troop dispositions had been pre-set for the players and with the restricting terrain I had anticipated little manoeuvre at the start of the battle. I was soon proved wrong, with the pro-Swedish Poles on both wings trying out some complex manoeuvres in the face of the enemy, presumably to confuse them about their intentions. The Swedes themselves must have been a little concerned when two Polish cavalry units from the left flank wheeled towards the centre and took up positions directly behind them.

Eventually the armies closed. The Allied light guns did little damage to the advancing Swedes – in fact the first significant event of the battle was the destruction of one of these batteries from Swedish musketry and a battalion gun. They must have hit a powder keg and startled the nearest Russian cavalry units, both of which failed their reaction tests and went disordered.
Around this time the first of the much vaunted Swedish cavalry crashed into an Allied cavalry unit and scored not a single hit. They lost a base immediately, but redeemed themselves by hanging on for almost the entire length of the game. The Swedish cavalry was more cautious thereafter and the brunt of the fighting was done by their infantry. The constant irritation of musket fire did goad some Allied cavalry to charge the Swedish infantry. They were usually beaten back and the Swedes able to follow up slowly.
On the wings the Pole v Pole fights were going fairly evenly. On the Swedish left two bow armed cavalry units were lost to enemy fire, but the heavier Pancerni and Hussars held their own.

On the Swedish right pro- Leszczynski dragoons occupied the village, but were soon forced out by the enemy. They had some success against a Saxon cavalry unit that had been stung by bow fire and was fragmented trying to drive them off. But here also the heavier Hussar and Pancerni units largely cancelled each other out in combat.
Now the Allied flank march finally emerged from the woods to threaten the rear of the Swedish right. The pro- Leszczynski Poles would have to react and send some forces to protect the wagon camp. They had just begun to do so when disaster struck. Their best cavalry units lost a succession of three melees and all went disordered in the cohesion tests. They also lost a general in these combats and all three went fragmented in those cohesion tests! The next round of combats saw all of the fragmented units break and in one fell swoop the Swedish right had collapsed.

The Swedish left was still holding but it would only be a matter of time before the wagon camp was attacked and their supply line broken or the successful Allied Polish cavalry threatened their rear. The Swedes had managed to destroy 4 Russian cavalry units but only one of the armoured Saxon units – there were still 23 Allied to break through! The Swedes now committed some of their second line troops. For only the second time in the battle a Swedish cavalry unit charged home and again the legendary impact phase did nothing. They were soon routed. One of the prisoner of war infantry units was also routed by Saxon cuirassiers.
The night was drawing to a close. The thin blue line of Swedes was still largely intact with only three units lost, but their right and rear were exposed and there was little prospect of breaking out to their front. Surrender seemed the only viable option.

22nd BURTON UPON TRENT
18th & 19th February 2017
Wargames Weekend
Meadowside Leisure Centre
High Street
Burton upon Trent
DE14 1TL
You are invited to come and join in our 22nd annual competition weekend and play one of the following;
DBMM Doubles
500 points any book 500BC—476AD.
£34.00 per team.
FOG Ancients Doubles
900 points any book 501AD—1149AD.
£34.00 per team.
FOG Renaissance Doubles
900 points any book 1618AD—1659AD.
£34.00 per team.
Renaissance special rule- Any heavy artillery used must be the first
battlegroup(s) deployed, followed immediately by any medium artillery used.
Art De La Guerre Doubles
400 points any book 500AD—999AD.
£34.00 per team.
ADLG Special rules;
1 400 points made up of 2 x 200 point armies. Each army must not be more than 210 points with a combined total of no more than 400 points.
2 The armies chosen must be listed as potential allies in either army list. All troop options used from both lists must be available within the time period 500—999AD.
3 Commands from each 200 point “army” may be intermingled at deployment. Each player must command the 3 adjacent commands in their half of the table.
4 The break point of the army is the combined total of both armies.
5 If flank marching or ambushing 1 command it is permitted to start with 2 commands for one player and 3 for the other and then transfer one command to maintain the 3 + 3 requirement once the flank march arrives or ambush is revealed, in order to disguise the flank of arrival. In the same principle, if only one flank march/ambush is being attempted, either player may roll for it.
6 Each player has a separate standard camp that must be deployed in their half of the table. The loss of each camp counts as per the standard 200 point rules.
7 Teams are expected to roll for and move 1 command each simultaneously in order to not unduly delay play and to resolve combats together as well where possible.
Entries and lists for all competitions to dgreen@green2004.fslife.co.uk
Cheques payable to BURTON AND DISTRICT DBM
To Dene Green
19 Rosecroft Gardens
Swadlincote
Derbyshire
DE11 9AF
Registration from 8.30am
Games on both days are 9.30am—1.00pm
and 2.00pm—5.30pm
New Venue information
Meadowside Leisure Centre
High Street
Burton upon Trent
DE14 1TL
Venue
Accommodation
Bars and Pubs
Restaurants
BADCON Merchandise is here –
