All posts by Jon Phipps

The Tyrannids in Warhammer 40K 8th Edition: First Impressions

Just dusted off my Nids for the first time in 8th edition, so here are my thoughts. The battle was a 100 Power Level game, fought against Josh Gregory’s Raven Guard.

Various gribblies: Ripper Swarms, Termagaunts, Hormagaunts

As with previous editions, it was a bloody affair with the Nids, with stuff being taken off by the handful. The outcome? Well, in terms of Objectives it was a 7-6 victory to the Emperor, but to be fair I called the game early as I was in danger of getting tabled! So in some regards got my ass handed to me. In my defence:
· It’s a pretty old army, which grew out of the Battle of Macragge boxed set (4th Edition!), and contains none of the more recent models;
· Josh just played better than me!

So don’t be too disheartened if you’re seeking to use Tyranids in 8th edition.
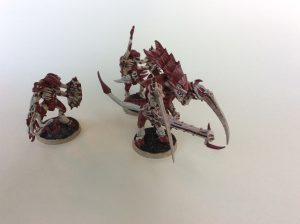
“Get away from her you Bitch!” – Hive Tyrant and Guard

The Army List
Playing using PLs rather than points meant that the army was genuinely WYSIWYG-ed. None of this tooling-up malarkey from either army. My list was very much based on a “Gribbly” approach, i.e. lots and lots of low value stuff. The list comprises:
· 2 HQs…a Hive Tyrant (non-flying variety but armed with a very nice Heavy Venom Cannon); and a Broodlord;
· A unit of 6 Warriors, with Scything Talons and 4 different types of ballistic weapon;
· Two units of Genestealers, 15 and 20-strong respectively;
· Two units of Termagaunts, both 20 strong, one armed with Fleshborers and the other with Devourers;
· One unit of Hormagaunts, 30 strong, with Poison Sacs (modelled on, honest);
· One unit of Ripper Swarms, 8 bases;
· Two Carnifexes, one tooled up for close combat, the other for shooting;
· A small unit of 3 Zoanthropes;
· A single Biovore.

That’s 113 bases of Gribblies! So pretty old school.

The Way the Game Played
Six objective markers were placed under the conditions of the “Cloak & Dagger” scenario, slightly favouring me.
I deployed with the Gaunts out in front, Genestealers immediately behind them, and the bigger creatures (including Synapse creatures) immediately behind or to the flank of the horde. Only the Ripper Swarms were kept in reserve. Josh deployed 5 small units of Scouts with sniper rifles at some distance, plus two big aircraft, but the rest of his stuff off table.

Smashey & Nicey, my two Carnifexes

I got first move. My initial approach was simple…the horde plus their supporting models went screaming across the table towards the Scouts in the old [Nid] style. First turn wasn’t conspicuous by its success. Firstly, under a special Raven Guard rule, a couple of mean looking Tactical Squads appeared (literally) out of nowhere. Then my shooting did next to nothing (a familiar Nid refrain). Then my Hormagaunts failed to charge (despite casting a Psychic spell on them allowing them to Advance AND charge, and using a CP to roll another dice…). Still, the horde was looking good and relatively untouched…
The it was Raven Guard turn one. Things started to go south very rapidly from that point:
· Stuff dropped from the skies all around the Tyranid horde, Assault Marines and Shrike himself, making it difficult to focus on single target;
· An Callidus Assassin appeared, not doing a lot of damage but tying up the shooty Carnifex and the Zoanthropes for most of the game;
· The Hormagaunts managed to charge in against a tactical Squad but were relatively ineffectual against the Marines’ armour save;
· The two units of Termagaunts, realising their shooting was ineffectual, also charged in, but made little headway against Shrike and another Tactical Squad respectively;
· The Warriors’ firing was completely ineffectual against the aircraft and Shrike;
· And my two most impressive units, the Hive Tyrant and the melee Carnifex, meandered around in the centre of the table, looking for targets that never emerged. Eventually these were picked off by a combination of aircraft and snipers.

The Raven Guard didn’t have it all their own way. The Genestealers wiped out two Imperial units in melee; the Ripper Swarms managed a handy charge the turn they came on, against a Scout unit which went well; and eventually got rid of the pesky Assassin. But when the Hive Tyrant went down I knew it was time to call it a day…

Lessons Learned
To be honest, given the vintage of my army I’m not really in a position to offer advice on how to play a modern Nid army. I collected mine before the days of Trygons, Tyrannocytes, Tervigons, Venomthropes etc. However, for those who still seek to win with a Gribbly army a few pointers:

Genestealers : These bad boys are BACK, baby! Remember how awesome they were in 4th Edition? Not only beating up Terminators but being able to flip a Land Raider? Well, they had their wings clipped a bit in 5th-7th Edition, so using them dropped out of favour, but in 8th just look at some of their attributes:
· Movement: Fast! Not only is their base move 8”, but they have a special rule whereby they can Advance and Charge in the same turn. Assuming average variable rolls, they can cover 18.5” into combat in a turn;
· Attacks. Three per model, but 4 per model if the unit is 10+ strong!;
· To Hit. 3+, but 2+ if the Broodlord is within 6”;
· To wound. Wounding a Space Marine on a 4 (resolved at -1 AP), but any rolls of 6 on the To Wound roll is resolved on a -4 AP;
· To save: This was always the ‘Stealers Achillies Heel, but at least the 5+ is now Invulnerable.
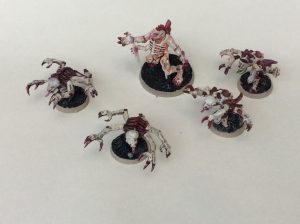
The Genestealers are back!

Psykers: The Nids have some cool Psychic abilities, all resolved on a 6+. And it doesn’t need to depend on your Hive Tyrant, your Zoanthropes can dish out the damage too (and only 6 PL for 3 models):
· The Horror: Enemy unit suffers -1 To Hot and -1 Ld until the start of your next Psychic phase;
· Catalyst: Assume Necron-like abilities! A friendly unit can ignore a wound on a 5 or 6 after all else has failed;
· Onslaught: A friendly unit can move, advance, shoot and charge in the same turn with Zero penalties.

Other advice:
· You want your Gaunt units as big as possible and as cheap as possible (don’t waste points on Devourers, Toxin Sacs etc…unless you’re up against Imperial Guard);
· Use sacrificial Gaunt units to screen Genestealers and Carnixes, plus a foot-bound Hive Tyrant. They can achieve little else;
· Ripper Swarms. Use in smaller units and only to grab objectives while the rest of the army is involved in serious business;
· Tyrannid Warriors. Maybe I didn’t use them right. They seem to have little use other than as another Synapse unit. So either ditch them or reduce to 3 strong and hide behind the hordes of Gaunts;
· Don’t bother with Biovores unless you have a couple of points looking for a home.

Other than that, check out some better advice than I can offer via YouTube!

Building A First World War Italian Army

I confess to coming a bit late to WWI wargaming and the Square Bashing system specifically. Well, I’m here now, and getting to grips with putting together an Italian army to drive back the wicked Central Powers.
Why the Italians? Well:
Nobody else has them in the BAD Club…there are worse reasons to collect an army!
Some great troop types: Bersaglieri, Alpini, and armour-clad Arditi (the latter classed as Stormtroopers);
Actually, they engagement in WWI is much more interesting than people think (see below).

WWI Italian Alpini Infantry

The Italians in WWI
The stereotype of Italian involvement in WWI was the grinding slog on the Italian/Austrian frontier. Yes, in terms of sheer manpower, this was by far the most important contribution the Italians made. This front was largely in three unequal phases:
1915-17 The slow grinding Italian offensives against the Austrians, most famously on the Isonzo River, but also more interesting battles in the mountains of the Trentino. This phase of the Italian really a war of attrition;
Late 1917 The Carporetto Counter-offensive. With troops freed up by the surrender of Russia, and more importantly some help from the German army, the Austrians drove the Italians back to the gates of Venice. Over a third of the Italian army was captured or killed, and the leading general Cardona sacked;
1918 Eventual Victory. The Italians finally won an overwhelming victory over the Austrians at the Battle of Vittorio Veneto, leading to an Austrian armistice.
But the italians were involved on other fronts, making them really interesting:
A volunteer expeditionary force sent to the Western Front in 1914-15 to aid the French, and some divisions in 1918 which saw action at the Second Battle of the Marne;
Putting down revolts in their newly established colonies in Libya and Eritrea;
A small expeditionary force to help the British in Palestine;
Most successfully, their offensive in the Balkans. They drove the Austrians out of Albania, and with the French and Serbians invaded Montenegro. They also sent a division to guard the Salonika Front.

Osprey’s Italian Army of WWI book

Wargaming the Italian Army
Most accounts of the performance of the Italians characterise their troops as being very brave and dogged, but commanded by incompetent and often brutal officers (executions for desertions were rife). Their performance was not helped by their apparently poor use of artillery.
All of this is represented in the SB Army Lists. They have a good mixture of troop quality, but they have a Poor Higher command rating and below average artillery assets.
In terms of other stuff:
Armoured Units. They tended not to use tanks (apart from a few loaned by the French) but did make extensive use of the armoured car;
Mortars and light guns were better than their heavier artillery;
Good use of MGs;
An early adopter of aircraft. In fact, their bombing sorties in the Italo-Turkish War of 1911 was the first use of fixed wing aircraft in any conflict;
The aforementioned Arditi are classed as Stormtroopers in the lists;
As they were fairly late into the War they made limited use of cavalry.
In terms of uniform colours, the Osprey Men At Arms book on the period is one of the better ones, having a clear and unambiguous description of Italian uniforms and their colours.

My own army
I’ve always been a fan of the very quirky Irregular Miniatures, ever since first using them at the end of the 1980s. So I was pleased to see an extensive range of WWI Italians made by them.


I’m going to go:
1 Unit of Stormtroopers (Arditi)
2 Units of Professionals (Bersaglieri)
6 Units of Regular (in French-style helmets)
4 Units of Reservists (in after cloth hats)

4 pieces of artillery
A bunch of machine guns
1 Mortar
1 Units of Cavalry
1 Heavy Armoured Car
This is a project which should take up the next few weeks, after which I’m looking forward to taking on my Austrian, German and Turkish opponents…

The Necron Army in 8th Edition Warhammer 40K : One Overlord’s View

So 8th edition 40K is well and truly upon us, and early indications are that it’s given the game a real breath of fresh air!

What prompted this blog was the fact that after a month I’d finally finished painting up my Ghost Ark…huzzah!

It took a while, but the Ghost Ark is complete!

This got me thinking about how effective this fascinating army is in the new edition. This is written purely from the point of view of looking through the new Index (including the Imperial Armour Index) and assessing it from that point of view. I may change my view after I’ve played…

Necron Overlord plus Warriors

The Pluses
Reanimation Protocols. Very different from 7th Edition, where RP were just treated like a second armour save. As long as a unit doesn’t disappear completely, you can roll a 5+ RP roll for every eligible figure lost every turn for the duration of the game. And that’s 4+ for every eligible unit within 3” of a Cryptek;
Living Metal. Eligible vehicles and characters automatically recover a Wound every turn;
Necron Warriors. Great value for only 12 points a figure (or 6 Power for a unit of 10);
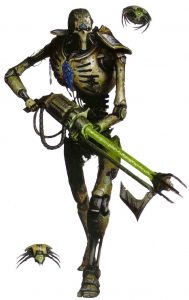
Monoliths. For the first time since 5th Edition, it might be worth having one of these bad boys. The Portal of Exile (D6 mortal wounds any any attacking unit); the fact it can move and shoot heavy weapons; and the effectiveness of its Gauss Flux Arc and Particle Whip are all real plusses;
Imperial Armour. Some of the Forge World models are REALLY good, and add real depth and ability to a Necron army.

The mighty Monolith

The Negatives
Points Cost. A lot of the key Necron models are now prohibitively expensive in terms of their points cost. Destroyers and the aforementioned Monolith are really expensive. Tomb Blades are now 39 points (assuming you give them Shieldvanes), a lot for a model with only 2 Wounds and a 3+ Sv. But the biggest lead is a Canoptek Spyder, now 81 points with a Gloom Prism (which you’ll need if the Necrons are to do any Deny The Witch rolls);
Gauss. Now enemy vehicles need not fear a Necron army. True, Gauss Flayers get a -1 armour save, and Gauss Blasters a -2, but no automatic wounds on a 6 I’m afraid.

The Canoptek Spyder…expensive luxury?

I’d like to think the Pluses outweigh the Minuses but we shall see…

My Own Necron Army
I started collecting Necrons circa 2005, albeit slowly. I lost interest for a while, but in 7th Edition the army became awesome again, especially with the addition of the Decurion detachment. So I added a bunch more stuff: Tomb Blades, Immortals, a Ghost Ark and (from Forge World) a Tomb Stalker.

The Tomb Stalker, from Forge World

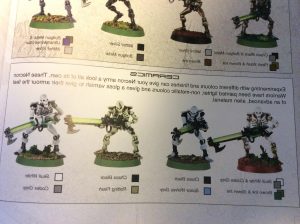
I went for a slightly unusual colour scheme. In the original Codex (way back in 2002) whilst most of the Necrons illustrated were in the standard Bolton Metal, I saw some interesting alternative paint schemes. One group of four examples were in “Ceramics”. This idea really appealed to me. Given their ancient armies, the Eldar, used a lot of heat weapons, Ceramics is a better material in dealing with heat than metal is, so that’s the rationale I gave myself. Plus, living and working in and around Stoke-on-Trent, the UK’s ceramic city, I wouldn’t resist painting them Wedgwood Blue!

The excerpt from the original Codex

What will I add to them next? Given the importance of Detachments, looks like I’ll need a couple more HQ types, and I’m definitely drawn to a Cryptek…

Warhammer 8th Edition…and Why You Should Play It

Like many current or former 40K players you may have become disenchanted over the past few years with the seemingly constant updates of the rules and codices. And given that Games Workshop’s stuff is not exactly cheap, have probably fallen off the 40K bandwagon along the way. You may have rolled your eyebrows at the thought of yet another edition (8th, which came out last month). However, here are a few reasons why you should pick up 8th edition 40K and roll with it:

Pricing Strategy
It’s all very well GW charging a premium price for a premium product. However, they clearly found that their prices were such that they were no longer the entry-level game of choice. Especially when you can pick up something like the X-Wing starter set and off you go. Having to pay £35 or more for rules, £25 for a Codex, and then the £100-200 for the starter army was definitely not entry-level. In competition with War Machine, Malifaux and the aforementioned X-Wing and there’s no comparison.

All that’s changed. You can now download the basic rules as a pdf for free. Yep, that’s right free. OK, you can still get the hardback rulebook for £35, if you like the background “fluff”, plus expanded stuff on scenarios, campaigns and other special rules.

ALL armies have now been converted into 8th edition and contained within five soft back volumes, called Indices, each £15 and containing 3-8 armies each. Bargain. Yes, they will be releasing all new codices throughout 2017 for completists, but the Indices are really all you need.

@ Games Workshop

The Return of Great Boxed Sets
My playing of 40K goes way back to 2004, and the halcyon days of 4th Edition. What really got me successfully into the game was the Battle for Macragge boxed set. A real bargain including Space Marine & Tyrannic armies, terrain, the rules, fast play sheet, dice, templates etc. There have been other good boxed sets but these have often cost circa £75…and at that price you’re generally committed to Dark Angels, Chaos Marines or whatever.

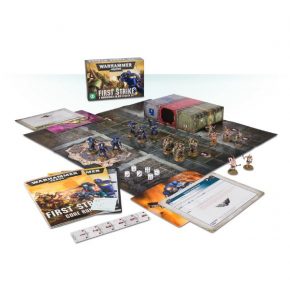
The great news is that the bargain box sets are back. In fact there are three. The Big Kahuna is Dark Imperium at £95. But you can also go low with Know No Fear at £50 and First Strike at £25 (which I think was the price of Macragge in 2005).

@ Games Workshop

The Rules
The core rules have really been stripped back. True, you can build into something as complicated as 7th edition, BUT you can start small and simple. The rules are condensed into about 12 pages of A4. This follows the path set by Warhammer : Age of Sigmar. So whilst at first glance they appear simpler, they actually contain many subtleties.

Highlights of the Rules:
Movement: Summarised into one page of A4. But different models now have different movement rates. The slower moving but relentless Necrons move at 5” for example, whereas most human types move at 6”;
Psychic Phase. Stripped down and simpler. Note that only Psykers can Deny The Witch, so armies like Necrons will suffer;
Shooting: Just 5 weapon types: Assault, Rapid Fire, Heavy, Pistol and Grenade. Interestingly certain types of weapon can erode an opponent’s armour save and do more than one point of damage. For example, a lascannon erodes an opponent’s armour save by -3, and does D6 points of damage…suddenly it’s worth having them!
Charge and Fight Phase. Ostensibly the simplest, but actually the subtlest, of the rules. Choosing which units you charge actually becomes crucial. And the new Heroic Intervention rule gives characters a bit more teeth.
Morale: Simplest of the lot, described in just two brief paragraphs.

@ Games Workshop

As I said, definitely worth checking out 8th edition…it’s really the best of both worlds, keeping the best of earlier editions, making the system more accessible but without chucking the baby out with the bathwater, which is arguably what happened with Age of Sigmar.


The Battle of Cropredy Bridge…a BAD Refight

Being an account of the BAD War-games Club’s refight of Cropredy Bridge at Partizan in Newark, in May 2017.

The “smart battaile” at Cropredy Bridge, which was fought on Saturday, June 29th, 1644, was one of the Royalist highlights in the Civil War campaigns of that year. Fought only three days before the shattering Northern defeat of the hitherto invincible Prince Rupert at Marston Moor (July 2nd), by which it has been overshadowed, but the favorable consequences of this victory for the Cavaliers’ fortunes in the South were of even greater far-reaching importance.

Background to the Battle

On June 6th, 1644, in a meeting between the Earl of Essex and Sir William Waller, it was decided by Essex that in addition to crushing the King’s Army when it had slipped out of the Royalist capital at Oxford as the two armies of Essex and Waller closed in, the task of relieving the town of Lyme Regis, which was besieged by King Charles’ younger nephew, Prince Maurice, and his Army of the West, was of equally pressing importance. The Earl of Essex then decided that he would proceed with his army to relieve Lyme, while ordering Sir William Waller to continue pursuing the King’s Oxford Army, and attempt to bring it to battle and crush it once and for all (it is important to note that at this time the King’s Oxford Army was not as strong or large as it would later become prior to the battle of Cropredy Bridge).

In mid-June 1644 the King marched his army to Witney where he met the Oxford garrison, absorbed it into his field army and moved on across Oxfordshire.

On 28th June 1644 Sir William Waller was near Banbury with his Parliamentary army while the King was at Brackley in Northamptonshire. Hearing of Waller’s approach, the King marched back to Banbury to seek battle with Waller. Each side took up a strong position on either side of Banbury and skirmishing began in an attempt to bring the other to action on favourable ground.

The Battle of Cropredy Bridge

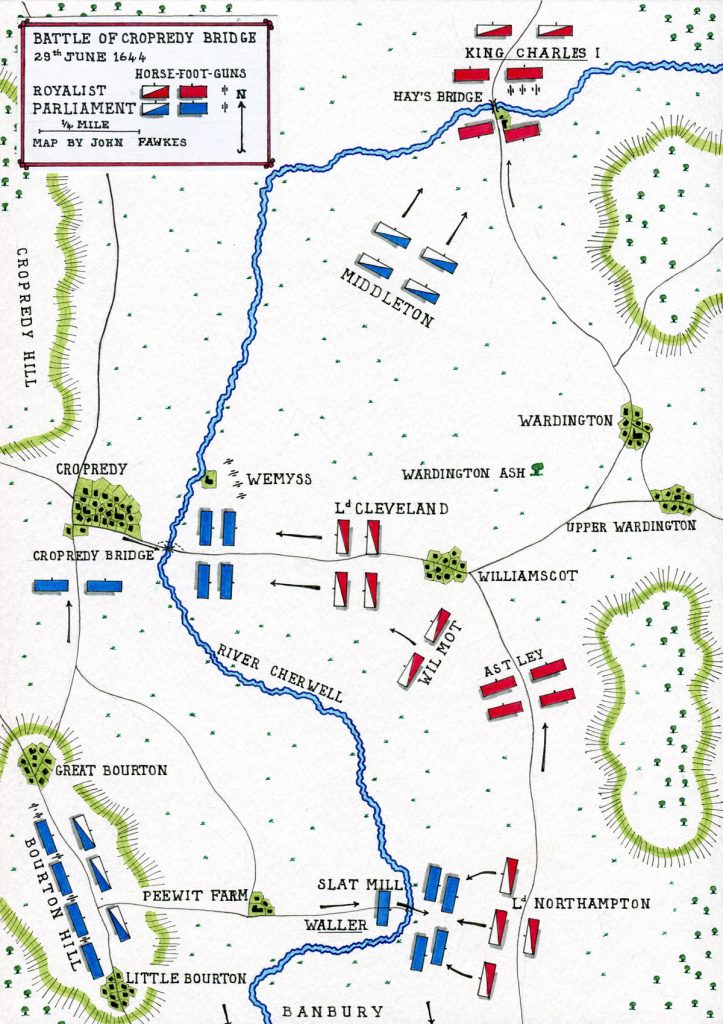
After a day in position, at around 8am on 29th June 1644 King Charles I set his army marching away from Banbury on the road towards Daventry to the north, his purpose being to draw Waller away from the favourable position he was occupying. The Royalist advance guard was commanded by the Earl of Brentford (newly elevated from the title of Lord Forth).  The King led the main army.  The cavalry brigades of Lord Cleveland and Lord Northampton with 1,000 Foot  formed the rearguard.

Soon afterwards Sir William Waller’s army set off following the Royalists by marching north along the road to the west of the Cherwell river which led to Southam.  The two armies were marching north on parallel roads. Both armies comprised about 9000 men,

Waller reached Bourton Hill, on which are Little and Great Bourton villages, three miles to the north of Banbury.  From this vantage point Waller could see the Royalist army on the far side of the River Cherwell approaching a point level with Cropredy.

The Cherwell could be crossed in the area at three points; a ford at Slat Mill immediately to the east of Great Bourton village; Cropredy Bridge to the east of Cropredy; and Hay’s Bridge to the north east of Cropredy on the Daventry road.


In order to secure his flank King Charles I detached a party of Royalist Dragoons to hold the Cropredy Bridge and Ford until his army had passed. At about the same time the Royalist advance guard was ordered to press on and cross Hay’s Bridge to intercept a force of Parliamentary Horse that was reported to be approaching from the north with the intention of joining Waller’s army.

The effect of the King’s order was to speed up the rate of march of the advance guard and the main body.  The rearguard was unaware of the change and continued at the previous pace so that a gap opened between it and the main body. From his vantage point on Bourton Hill Sir William Waller observed the gap opening between the rear and main bodies of the King’s army and resolved to cut off the Royalist rearguard.

At around 11am Waller moved with 1,000 musketeers to Slat Mill ford and dispatched Lieutenant General John Middleton with a mixed horse and foot command to Cropredy.

Middleton’s Horse dispersed the Royalist Dragoons holding the Bridge and attacked the rear of the Royalist main body pursuing it as far as Hay’s Bridge where they were finally checked by musketeers positioned in the road behind an upturned cart.

At the rear of the Royalist army Waller was across Slat Mill Ford when he was fiercely attacked by Lord Northampton’s four regiments of Horse and the Parliamentary musketeers driven back across the Cherwell River. The other brigade of the Royalist rearguard, Lord Cleveland’s, did not wait for orders but charged the Parliamentary Foot that had crossed at Cropredy as part of Middleton’s force and threw them into disorder.

Meanwhile the advance guard and the main body of the Royalist army had halted on the north side of the Hay’s Bridge crossing point. Lord Bernard Stuart with the King’s Life Guard re-crossed the river and attacked Middleton’s regiments of Horse, which had returned to counter-attack Lord Cleveland in flank, driving them back to Cropredy Bridge.

The remnants of General Middleton’s Horse and Foot was driven back across the Cherwell into Cropredy, while a force of Parliamentary artillery comprising fourteen guns and the commander Colonel Wemyss was overrun and captured on the east side of the river by the triumphant Royalist Horse.

The main Royalist army had re-crossed the Cherwell at Hay’s Bridge and now assembled in the village of Williamscot on the Cropredy road. Waller withdrew his troops to Bourton Hill leaving the crossings manned by Dragoons and Foot where they were subjected to a full attack by the Royalist army.

The Tower Hamlets Regiment of the London Trained Bands and the Kentish Regiment supported by two small drake canon held Cropredy and repelled the attack.

Towards the end of the day’s fighting King Charles I sent a message to Sir William Waller inviting him and his army to submit and return to their allegiance to the Crown.  Waller replied that he had no authority to negotiate on behalf of Parliament.

The Royalist army remained in position during the next day, but on the following day receiving a report that Major General Browne had arrived in Buckingham with 4,500 Parliamentary troops and was marching to join Sir William Waller, the Royalist army left the severely mauled Parliamentary army on the battlefield and marched westwards towards Evesham.

The Refight

The battle was a refought by the BAD Club at the excellent Partizan show in Newark in May 2017.

It was refought in a 25mm scale, using largely Warlord plastics, but with a lot of older metal figures as well. Rules used were Field of Glory Renaissance.

The BAD Wargamers pose for a shot halfway through the game

Many of the Club helped out with the game, big shout out to Ray Boyles for putting together some excellent interpretation panels.

The key players were:

  • King Charles I – Peter Gregory
  • Earl of Cleveland – Steve Holt
  • Earl of Northampton – Paul Freeman
  • Sir William Waller – Ian Wilson
  • General Sir John Middleton – Any Dumelow

Early parts of the refight went largely as anticipated:
(1) Middleton drove North, almost reaching Hay’s Bridge but being stopped by some determined Royalist infantry


(2) Initial attempts by Waller to move north from Slat Mill were frustrated by Northampton

Cropredy to the left of the photo, Waller’s army marching towards Slat Mill on the right

(3) The London Brigade took up a strong position both sides of Cropredy Bridge.

But then the pace of the battle changed. Cleveland and Northampton’s cavalry shot their bolt and retired north. Similarly Middleton, once repulsed, fell back behind the London Brigade. The latter went on the offensive, routing isolated units of Royalist foot. And during this time both Waller and the Kind were bringing the bulk of their armies to bear for the conclusion.

Alas, there was no conclusion! As the main armies lined up to face each other, night fell, leaving the outcome inconclusive (although in truth Parliament had performed better than their historic counterparts).

A fun re-enactmen, and one I’d be pleased to refight again!