A Scanian War refight – not the Danish detective series
The Danes had controlled much of modern southern Sweden until the Treaty of Roskilde in 1658 when they were forced to cede several provinces, including Scania, to their northern neighbour. They were naturally keen to reverse the situation as soon as possible, and their opportunity came when Sweden found itself embroiled in a war with Brandenburg in 1674. A defeat at the relatively minor battle of Fehrbellin in 1675 put Sweden on the defensive, and many troops were subsequently tied down defending her German possessions.
The decision to invade Scania was made and a Danish army of around 14,000 landed at Helsingborg in June 1676. Aided by the still largely pro-Danish inhabitants of Scania the weak Swedish forces were soon pushed out of the province and by July only Malmo remained in Swedish hands. In August Danish forces pushed northwards to try and take the town of Halmstad, but were swiftly routed by a newly raised Swedish army under Charles XI. The Swedish cavalry seem to have foregone the usual short range pistol fire in favour of an all-out sword in hand charge that was to become their trademark. The Danes sent reinforcements to besiege Halmstad but without success, and with Swedish reinforcements also arriving they decided to lift the siege and retired into Scania in November to quarter for the winter.

The Danish camp was on the opposite bank of the River Kavlinge from the Swedes and they had secured all practicable crossing points. They naturally assumed the fighting was over for the year, but as the winter progressed the river began to freeze over and by December 3rd the Swedish command considered it safe to attempt a crossing and advance on the Danish camp. The crossing was made before dawn on the 4th December, and the Swedish army gained a good position on high ground with their right flank secured by the town of Lund.
The Danes were now roused and hastily broke camp to face the enemy. They also formed up on high ground, on the opposite side of a small but deep valley from the Swedish army. The Danish army outnumbered the Swedes by c.13,000 to 8,000 men. They both had around 6,000 horse, but the Danes had three times as many infantry and heavily outgunned the Swedes. The battle commenced around 9.00 am.
As at Halmstad Charles XI personally led the Swedish right flank cavalry in a headlong charge to overwhelm the Danish cavalry on their left flank. The Danish commander was badly wounded and his troops routed back towards their camp where many were drowned attempting to cross a frozen river when the ice gave way. The Danish king Christian V also ‘left’ the battlefield during this rout for the relative safety of Landskrona though some Danish sources refute this claim. Charles and most of his command continued their pursuit to the Danish camp, so at a crucial time in the battle the Swedes were deprived of their inspirational king and their best cavalry.
In their absence the heavily outnumbered Swedish infantry in the centre took refuge from the Danish guns by dropping into the steep valley between them. The Danes responded by also sending their infantry into the valley and the Swedish infantry were forced to steadily wheel back towards the town of Lund. The Swedish cavalry on the left flank lost their general early in the fight and though far from beaten were also forced to give ground and retire towards Lund. At around midday the Danes halted for about an hour to reform for the final assault on the Swedes. The Swedes also took this opportunity to regroup and take up better defensive positions, but when the battle was resumed they again steadily gave ground under the weight of numbers.
At around 3.00 pm (almost dusk) Charles and a small group of his cavalry from the right wing returned to the battlefield and attempted to circle round the Danish rear to reach the Swedish cavalry on the left wing. The Danes abandoned their attack on the Swedish centre and turned to face the renewed threat from the Swedish cavalry to their rear. Charles made a brave dash with a handful of cavalry through the Danish lines to return to his battered centre. Inspired, his exhausted and still outnumbered command rallied and threw themselves onto the rear of the Danish infantry. Within half an hour they were routed with many killed as the Swedish pursued. A ceasefire was finally called in the gathering gloom at around 5:00 pm.
Lund was one of the bloodiest battles fought in Scandinavia with c.70% combatant casualties, effectively crippling both armies. The Danes lost at least 6,000 killed, 1,000 wounded and 2,000 captured; the Swedes lost c.2,500-3,000 killed and 2,000 wounded. The Danes retreated towards the fortress of Landskrona and then back to the Danish mainland, leaving the Swedes still in control of Scania.
I had been looking at the possibility of a refight of Lund for a while, but felt it was too large for a normal evening club game. When the room was booked for a day at short notice I touted the idea of another Danish-Swedish encounter as a one day game (I never reveal the name of the battle beforehand) and was pleased to get the 7 players needed.
The runners and riders were:
Swedish Right Wing:
8 cavalry including Lifeguard under Charles XI/Fersen – John
Swedish Centre:
5 infantry including 2 guard, 2 cavalry, 2 light guns under Ascheraden – Wayne
Swedish Left Wing:
8 cavalry, 1 dragoon under Galle – Steve
Danish Right Wing:
9 cavalry under F.Arensdorff – Dene
Danish Centre, First Line:
10 infantry including 4 guard, 2 medium guns – Pete
Danish Centre, Second Line:
5 infantry and (arriving turn 2) 3 naval squadrons, 3 guns – Bob
Danish Left Wing:
7 cavalry under C.Arensdorf – Simon G
So once again the Green Brothers played the Danish Brothers, but this could be the last time. C.Arensdorf was wounded in the arm during the battle of Lund and died 3 days later after an unsuccessful amputation. I don’t think Simon wants to take the refight to that level of accuracy.
John could only make the morning session, so was purpose made for the role of Charles XI. He was asked to go straight for the Danish cavalry opposite and drive them from the battlefield. I tooled up the Lifeguard Cavalry and classed them as elite (giving them the effect of being led by Charles in person without having to risk Charles in combat) and made all of this command Impact sword.
The other players were given a little more leeway in their commands. The Swedish cavalry in the centre were to remain pistol/pistol, but I gave Steve the option to make some or all of his cavalry impact sword. He went 50:50.
I also gave Wayne the option of making his Foot Guard salvo troops, this being the first time they were recorded as adopting (or readopting) this tactic. He duly took up the option.
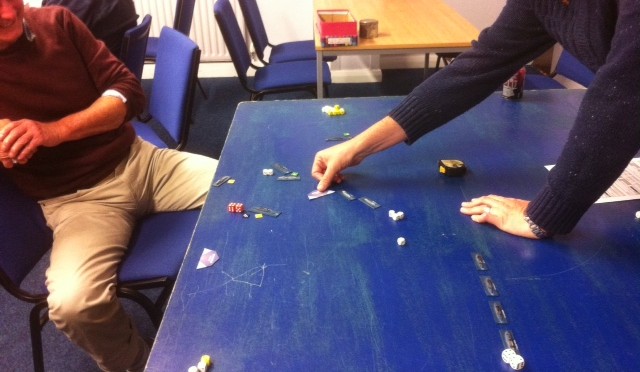
The battle opened with both Swedish cavalry wings advancing. The Danish left lasted longer than their historical counterparts by retiring as quickly as possible; the Danish right were more willing to mix it with their opponents. In the centre the Swedish infantry soon took up the option of dropping down into the valley to escape the Danish artillery fire.
The Danish left wing cavalry eventually ran out of room and had to fight, but they had pulled back far enough for the second line of Danish infantry to give some support. After an initial hold 5 of the 7 cavalry units were lost to the superior Swedish horse. Realising John’s orders seemed to be to pursue the Danish cavalry regardless of events elsewhere Simon retired his remaining cavalry from the battlefield. He was promptly pursued off table by 7 Swedish cavalry units (one had been dealt with by the Danish foot).
The Danish right wing fared a little better and lasted a little longer. Here the battle peaked in a massive 5 unit a side melee in which the Swedes eventually came out on top but didn’t totally destroy the Danes.
In the centre the Danish foot decided not to drop down and mix it with the Swedish foot, despite outnumbering them 2:1 (3:1 if you include their second line) and having battalion guns. The Swedes even advanced to musket range to trade shots with the Danes on the hilltops. Eventually numbers began to tell and the Swedish infantry fell back to their side of the valley.
It was at this point I brought in the hour long fatigue lull in the historical battle in the form of a free double move for infantry and triple for cavalry. This had to be away from the enemy and could ignore turning and pinning restrictions. The Swedish infantry used this to climb back up to their starting positions, and the Swedish left wing cavalry to pull back towards their infantry.
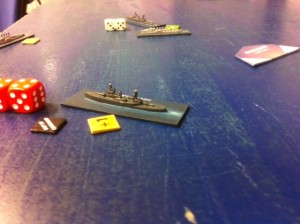
When battle resumed the Danish Infantry at last dropped down into the valley in pursuit of the retiring Swedish centre. But by now the first of the victorious Swedish right wing cavalry were returning (three units led by Charles in the dead centre of the Danish board edge). The Danish second line hastily headed after their first line towards the safety of the valley with the naval squadrons acutely aware they were highly likely to be ridden down in short order if they stayed. Two more Swedish cavalry returned the following move (the remaining pair were presumably still looting the Danish baggage) and 3 Danish guns were quickly overrun.
Most of the Danish army was now in the valley bottom with its infantry largely intact and the lead units climbing up to the original Swedish positions. There were too few Swedish infantry to counter attack and the odds would be with the Danes should the Swedish cavalry attack unsupported. It was certainly not the slaughter of the historical battle, but the Swedes held most of the high ground and they were not pressed back to the walls of Lund. They had also overrun the Danish camp and captured their supplies, so I would award a strategic victory to the Swedes with the Danes being forced to retire (albeit in good order) to Landskrona again.


